


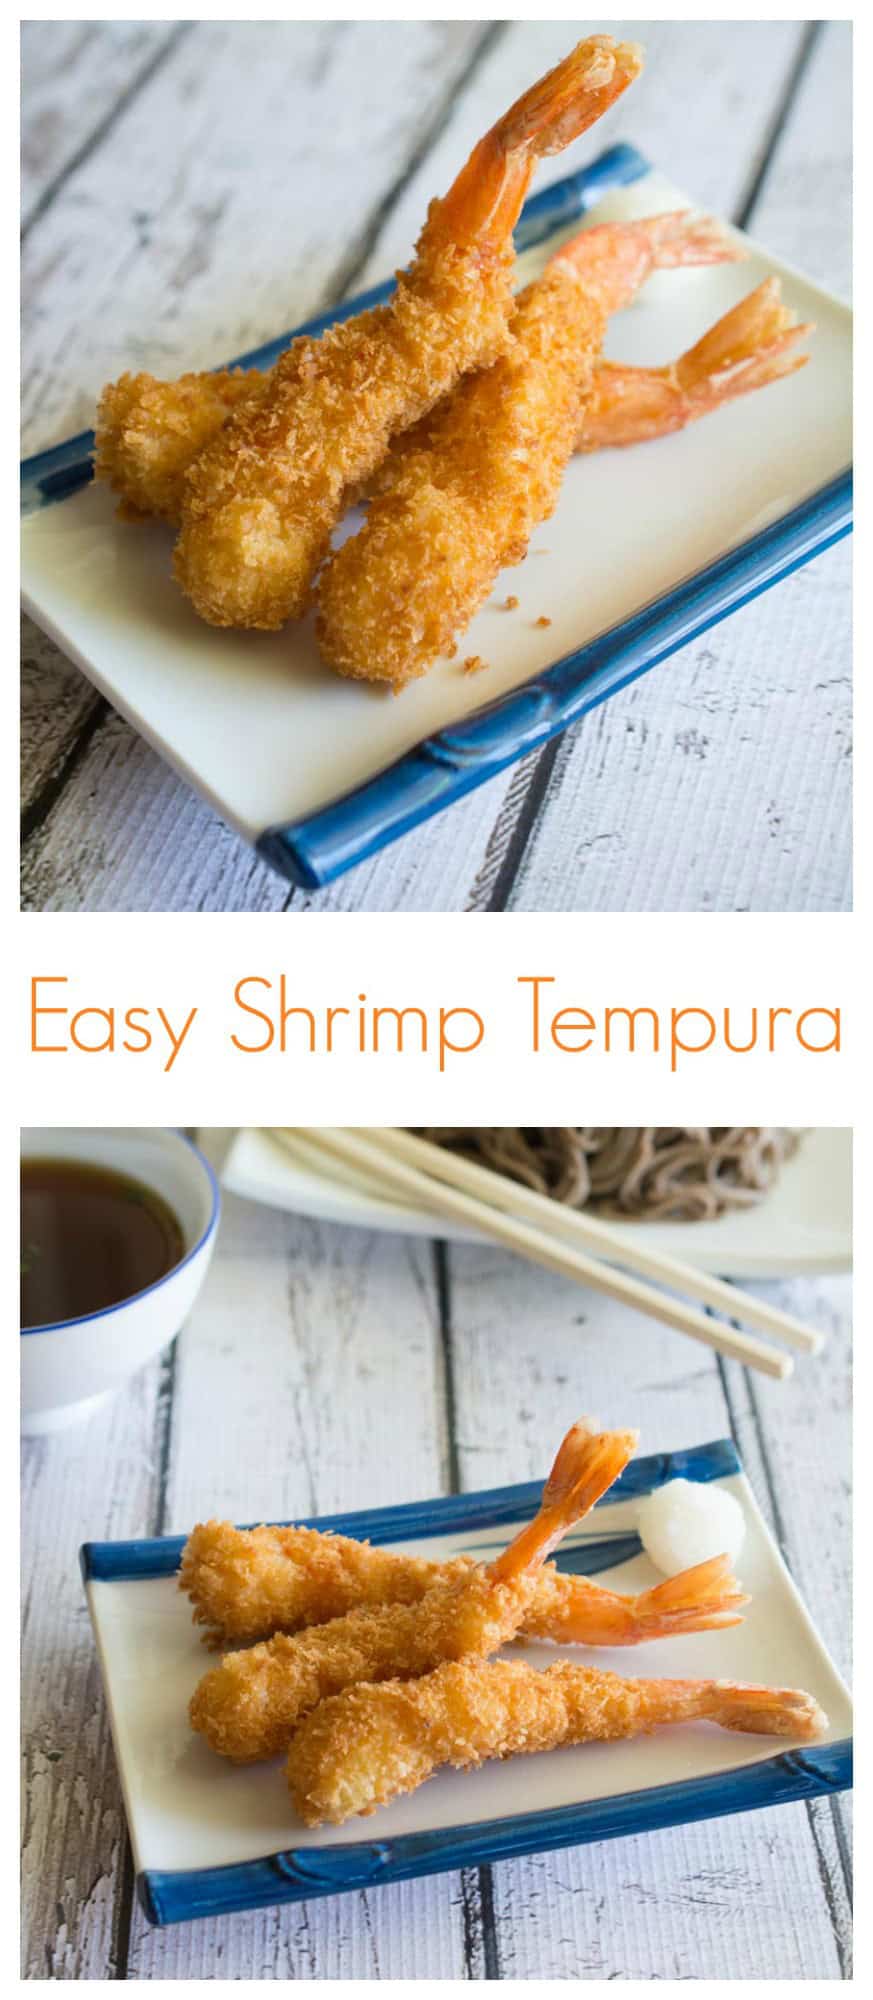
Does your shrimp curl up the moment it hits the hot oil? This step-by-step guide to Shrimp Tempura (Ebi Fry) includes the secret to keeping shrimp perfectly straight, plus a bonus oven-baked version!
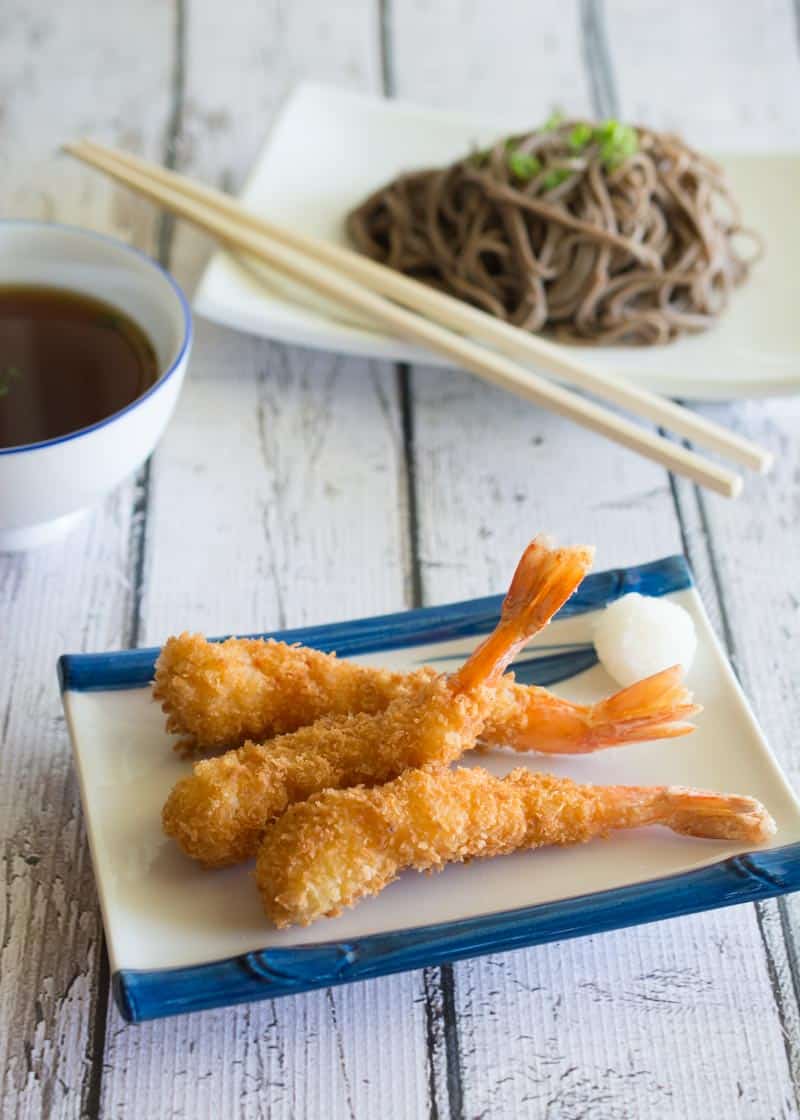
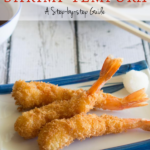
Shrimp Tempura is one of my all-time favorite Japanese appetizers. I love the sweet, juicy shrimp wrapped in an irresistibly crunchy coating. Shrimp Tempura is often served as an appetizer, but can also be paired with dishes such as Zaru Soba.
Fun fact: the panko breadcrumb version of this dish is actually called Ebi Fry. More on this in the next section!
My first few attempts at making this at home ended in disappointment. The batter always seemed too soggy, and I know this seems trivial, but I was also disappointed that my shrimp kept curling up! I wanted them to be straight, just like at Japanese restaurants.
After a lot of trial and error, I learned the secrets of getting that perfectly crispy coating AND keeping the shrimp straight. I'm sharing everything below, including a bonus oven-baked version!
Shrimp Tempura vs Ebi Fry
Both are delicious and feature deep-fried shrimp ("Ebi" means shrimp in Japanese!), but the difference comes down to the coating.
Shrimp Tempura (Ebi Tempura) uses a light, airy batter made from flour, egg, and cold or sparkling water, resulting in a delicate, pale crust.
Ebi Fry, on the other hand, is coated in panko breadcrumbs, giving it that thick, golden, crunchy exterior. Outside of Japan, the two terms are used quite interchangeably. "Tempura" has become something of a catch-all term for Japanese fried food.
When I lived in Oregon, several of my favorite Japanese restaurants served the panko breadcrumb version but called it Shrimp Tempura on the menu. So if you've always known it by that name, you're definitely not alone!
For making this dish at home, I find that Ebi Fry is more beginner-friendly. Panko breadcrumbs are very forgiving, almost guaranteed to turn out crispy, and absorb less oil than a wet batter. They also stay crispy longer.
Note: This recipe uses panko breadcrumbs (Ebi Fry style) and is best for shrimp only. For vegetables, you'll want to use traditional tempura batter. For simplicity, I'll be referring to this dish as Shrimp Tempura throughout this post.
The Secret to Perfectly Straight Shrimp Tempura
Shrimp will naturally curl up as they cook, but with one simple trick, you can keep them perfectly straight, just like at Japanese restaurants!
The secret is all in the preparation. By making a series of shallow cuts along the belly of the shrimp and then gently pressing down, you're essentially breaking the muscle tension that causes the shrimp to curl. It sounds technical, but it's super quick and easy...I promise!
Since shrimp is the star of this dish, use extra-large or jumbo shrimp for the best results. This recipe calls for 10 large shrimp.
First, remove the shell from the shrimp but keep the tails on. It looks more elegant and makes the shrimp much easier to handle when breading and frying.
Place the shrimp on a cutting board, belly side up.
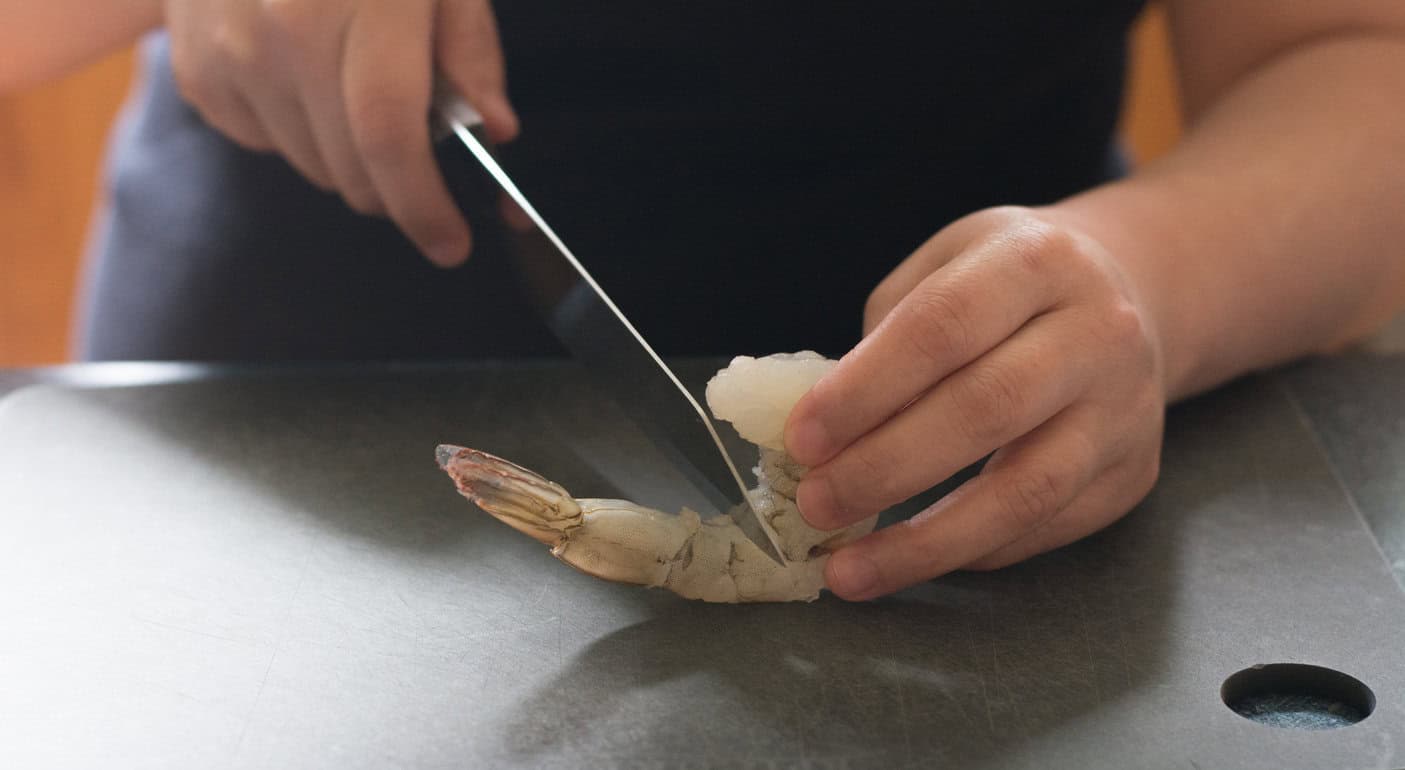
Make 4 - 5 shallow vertical incisions across the belly.
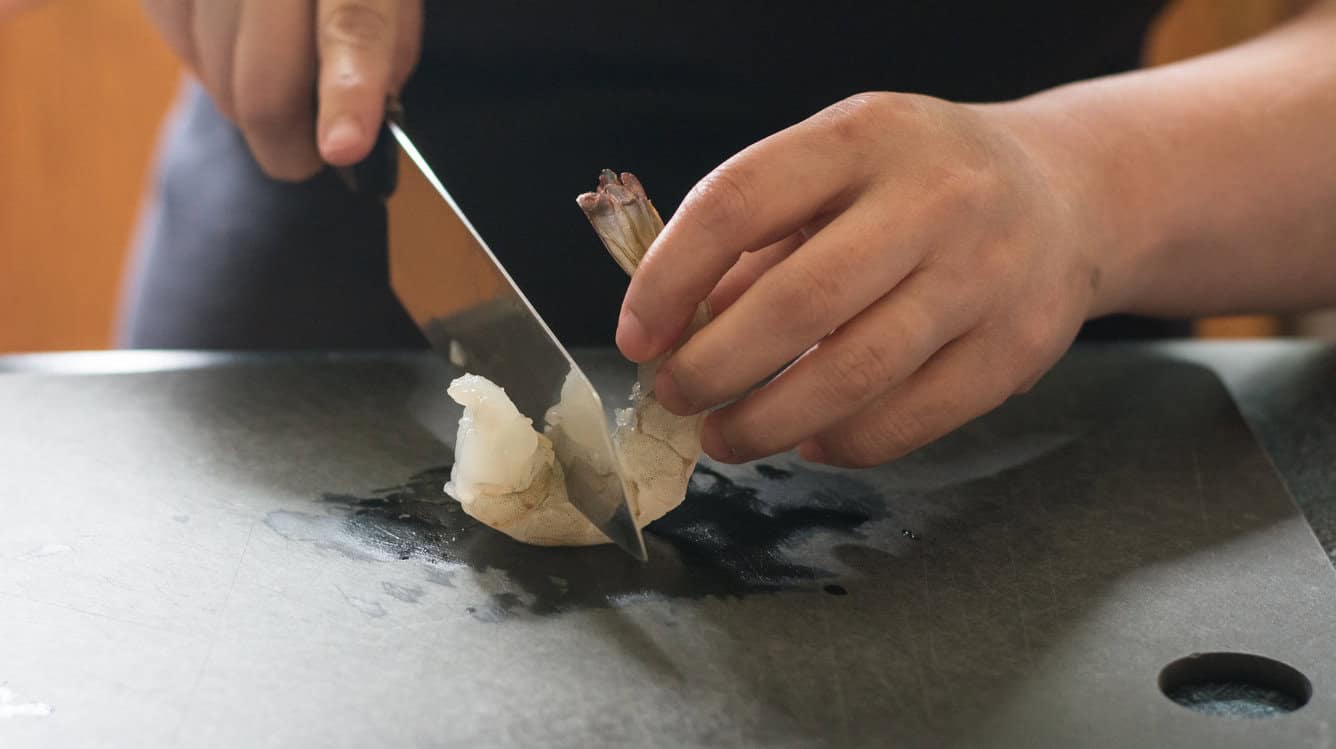
After you've made the incisions, flip the shrimp over so it's belly side down. Use your fingertips to squeeze the shrimp on the sides while pressing down.
Start from the tail and work your way up to the top. Be careful not to squeeze too hard (or it will split in two), but it should be firm enough that you'll hear a slight "snap".
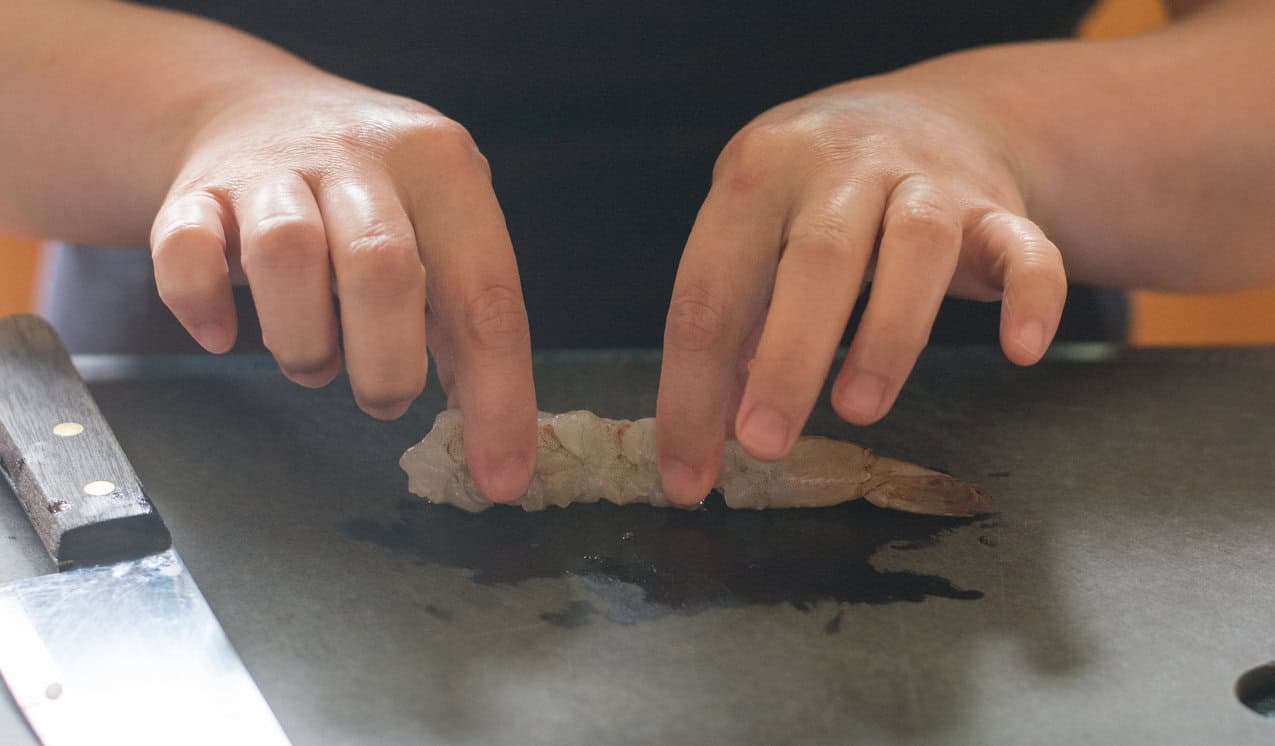
It's not going to look perfect. You'll see the huge incisions at the bottom, but that's okay - the panko coating will cover it all up!
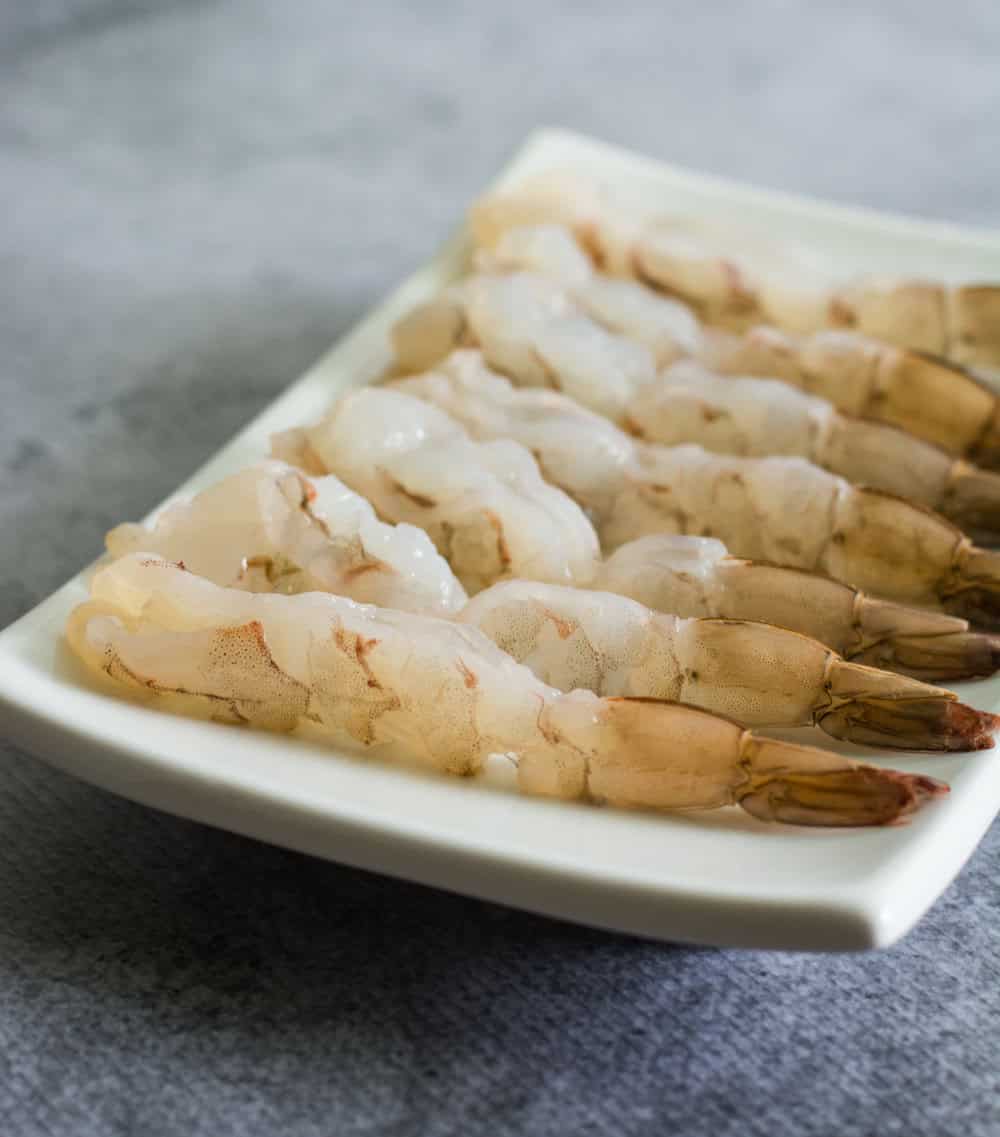
Finally, make sure the shrimp are as dry as possible before cooking. Pat them thoroughly with a paper towel; paying extra attention to the tails. Water tends to get trapped in there, which causes the hot oil to spatter when deep-frying.
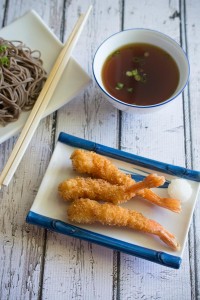
Shrimp Tempura Sauce
No shrimp tempura is complete without the classic Japanese tempura sauce.
Make the Tempura Sauce before you start cooking so you can enjoy your shrimp tempura at its absolute freshest. No waiting around while that perfect crunch disappears!
To make the sauce for tempura, combine ¾ cup water, ½ tablespoon dashi stock granules, 3 tablespoons soy sauce, 2 tablespoons mirin, and ½ a teaspoon of sugar in a small saucepan.
Would you like to save this?
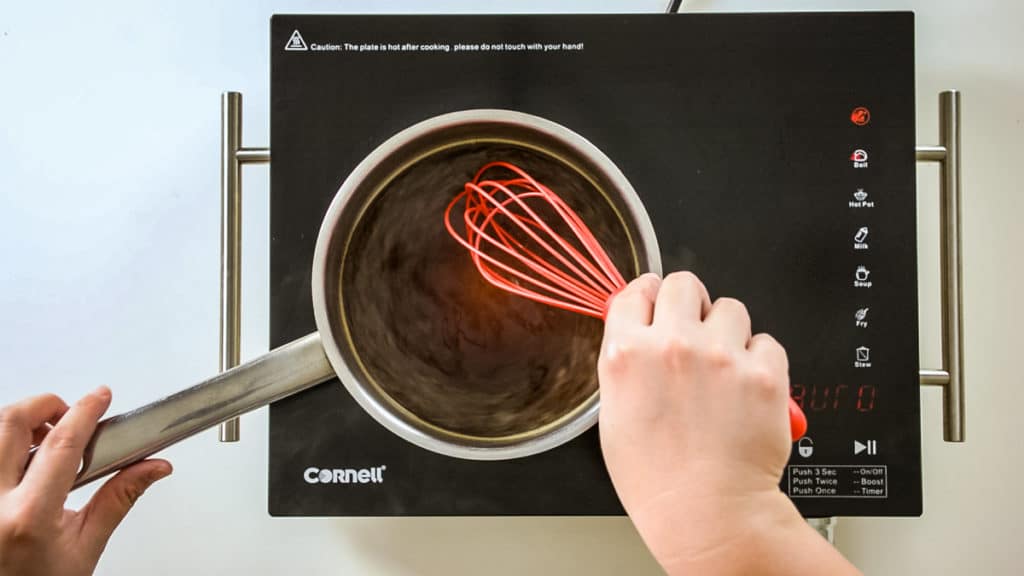
Give the ingredients a good stir, then bring them to a boil. Allow it to simmer for about 2 minutes, then turn off the heat.
Just before serving, add about 1 tablespoon of chopped scallions and half a tablespoon of freshly grated daikon radish to the sauce (optional but recommended!)
How to Deep Fry Shrimp Tempura (Classic Method)
My favorite cooking method for tempura is deep-frying. You can use a wok, pan, or a deep-fryer. Just add enough oil to fully submerge the shrimp, then heat it to 350-375°F.
Maintaining the right oil temperature is key. Too cool, and the shrimp will absorb excess oil and turn soggy. Too hot, and the coating will burn before the shrimp is cooked through.
Choose an oil with a high smoke point. Vegetable oil, palm oil, or canola oil are good options.
Set up your breading station: flour on one plate, 2 lightly beaten eggs in a shallow dish, and panko breadcrumbs on another plate.
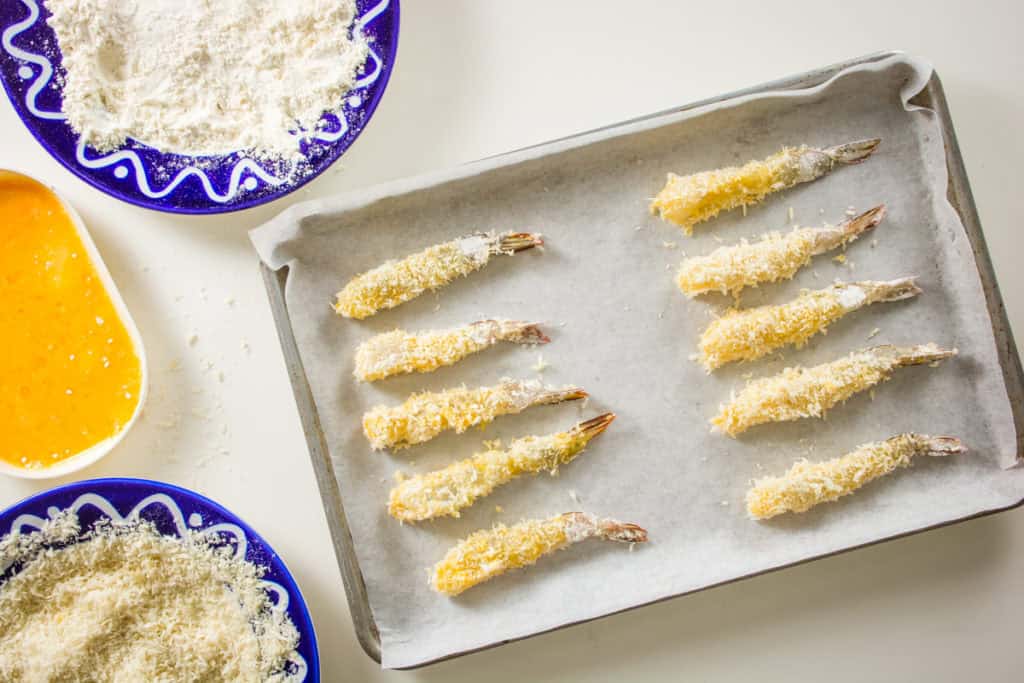
Dredge the shrimp in flour, shaking off any excess. Dip them in the egg, then coat thoroughly in the panko breadcrumbs![]() . Flour.....egg....breadcrumbs. That's it!
. Flour.....egg....breadcrumbs. That's it!
Gently lower the shrimp into the hot oil, then let them cook until they turn a beautiful golden brown. This should take only about a minute so keep a close eye on them!
Don't overcrowd the wok or pan; fry them in small batches.
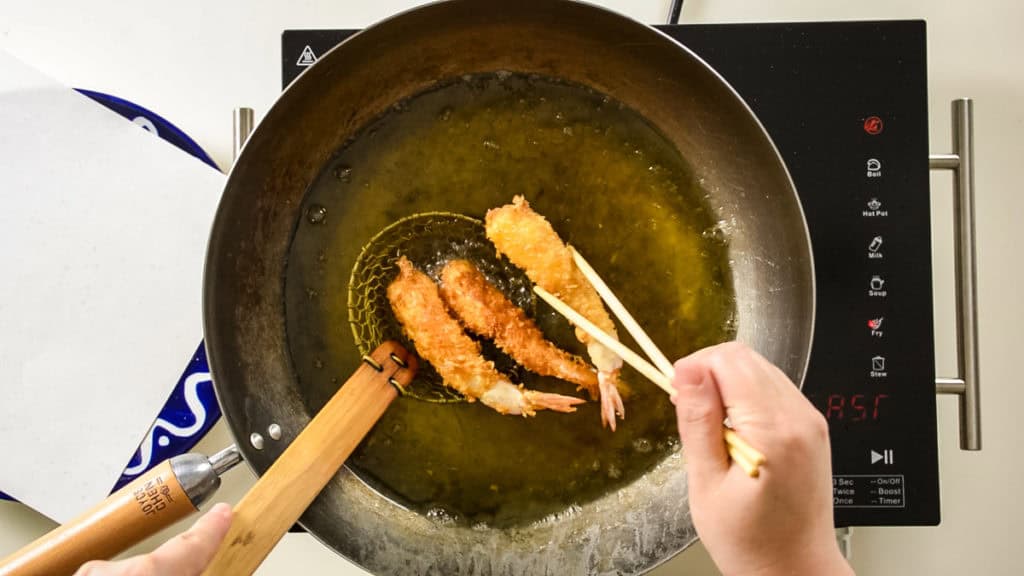
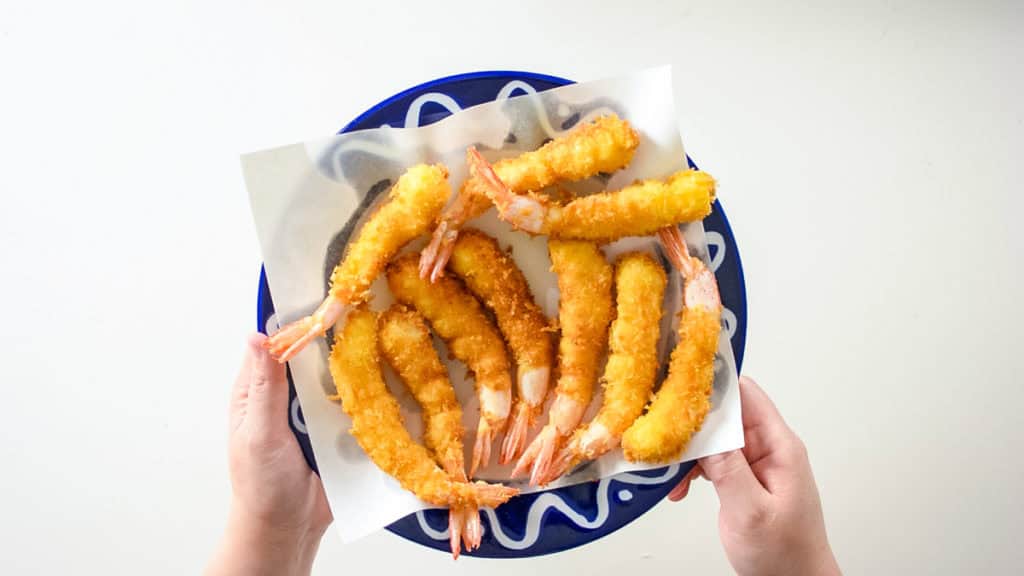
As you remove the cooked shrimp from the hot oil, place them on paper towels to absorb excess oil. You can also use oil-absorbing cooking paper, as shown in the photo below.
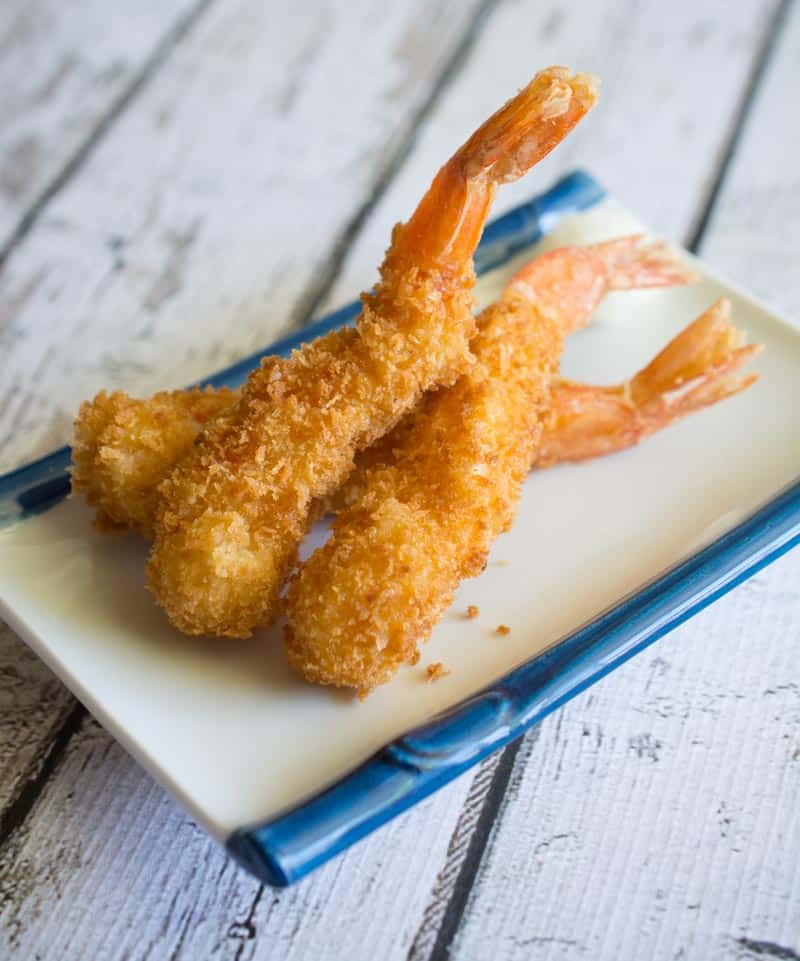
Serve immediately.
Baking Shrimp Tempura in the Oven
Want all the crunch without the deep-frying? Baking your shrimp tempura in the oven is a lighter alternative that still gives you golden, crispy results!
Preheat your oven to 475°F.
After coating the shrimp in the flour, egg and Panko breadcrumbs, place the shrimp on a baking sheet lined with parchment paper.
Bake for 10 - 12 minutes or until the crumbs are golden. Serve immediately with Tempura Sauce for dipping!
Enjoy!
💡Pro Tips for the Best Shrimp Tempura (Ebi Fry)
- Make sure the shrimp is as dry as possible before deep-frying to prevent oil splatters, especially the tail. Water gets trapped in there easily, so dry it thoroughly with a paper towel.
- Dip a wooden or bamboo chopstick (the ones that come with your takeout!) into the oil. If it starts bubbling immediately, your oil is ready. No thermometer needed!
- Don't overcrowd your pan. Fry only 3 - 4 pieces of shrimp at a time. Adding too many shrimp at once drops the oil temperature which may result in a soggier coating.
- Use a spider skimmer to easily and safely remove the cooked shrimp from the oil.
Frequently Asked Questions
Shrimp Tempura uses a light batter made from flour, egg and cold water (or sparking water), while Ebi Fry is coated in panko breadcrumbs for a thicker, crunchier exterior. Both are amazing, but this recipe uses panko breadcrumbs.
The secret is to make several shallow cuts along the belly, then gently press down from the tail to the top until you hear a slight snap. This breaks the muscle tension that causes them to curl up when cooked. Don't worry about the shrimp not looking pretty after they are cut...the batter will cover it all up!
It is most likely because your oil was not hot enough or an overcrowded pan (which would cause the temperature to drop). Make sure your oil is between 350-375°F before adding the shrimp.
Do not microwave leftover shrimp tempura! It will make the coating soft, and the shrimp rubbery. Reheat it in the oven at 400°F for 5-7 minutes or in the air fryer at 350°F for 3-4 minutes to restore that crunch in the batter.
Shrimp tempura is best enjoyed fresh and immediately after cooking. You can prepare the shrimp ahead of time (cut them so they stay straight), but I wouldn't recommend breading them too far in advance, or the panko will get soggy.
Shrimp Tempura (Ebi Fry)
Ingredients
Tempura Sauce
- ¾ cup water
- ½ tablespoon dashi stock granules
- 3 tablespoons soy sauce
- 2 tablespoons mirin
- ½ teaspoon sugar
- ½ tablespoon grated daikon radish
- 1 tablespoon chopped scallions
Shrimp Tempura
- 10 shrimp extra large or jumbo, peeled and deveined, tail on
- 1 cup all purpose flour
- 2 eggs lightly beaten
- 1 ½ cups Panko breadcrumbs
- cooking oil for deep-frying
Instructions
Tempura Dipping Sauce
- Combine water, dashi stock granules, soy sauce, mirin and sugar in a small saucepan. Give everything a good stir.
- Bring to a boil, then reduce to a simmer for 2 minutes. Remove from heat and allow to cool completely.
- Just before serving, stir in the freshly grated daikon radish and chopped scallions.
Shrimp Tempura (Ebi Fry)
- Place each shrimp belly side up on a cutting board. Make 4-5 shallow cuts across the belly.
- Flip the shrimp over so it's belly side down. Using your fingertips, gently squeeze the sides while pressing down from tail to top until you hear a slight "snap." This keeps the shrimp straight during cooking.
- Pat the shrimp thoroughly dry with a paper towel, paying extra attention to the tails.
- Heat cooking oil in a wok, pan or deep fryer to 350-375°F.
- Set up your breading station: flour on one plate, beaten eggs in a shallow dish, and panko breadcrumbs on another plate.
- Dredge each shrimp in flour, shaking off any excess. Dip in egg, then coat thoroughly in panko breadcrumbs.
- Gently lower 3-4 shrimp at a time into the hot oil. Fry for about 1 minute or until golden brown. Don't overcrowd the pan!
- Remove and drain on paper towels. Serve immediately with dipping sauce!
Oven Baked Option
- Preheat oven to 475°F.
- After breading the shrimp, place on a baking sheet lined with parchment paper.
- Bake for 10-12 minutes or until golden and crispy. Serve immediately!
Nutrition
Here are more Asian Shrimp recipes to try!


Dennis says
Looks super tasty and fun to try (also very well explained) 😀
Keep it up Char!
Char says
Thanks so much, Dennis! 🙂
Cassandrea says
Looks delicious and one of my favourite foods I haven't ever tried to make on my own before! Now I will! 🙂
Char says
I hope you'll give it a try, Cassandrea! 🙂 Cheers!
sprinklesandsprouts1 says
These look scrumptious. I love crispy prawns (shrimp)
I can't wait to try this and then dip them in some chilli sauce.
🙂
Char says
Yum!! Yay!! I love chili sauce 😀
Bali Tour says
great article
thanks for the recipe 🙂
Char says
Thanks so much, Bali Tour 🙂 Cheers!
Bali says
Looks super tasty and fun to try (also very well explained) ?
Char says
Thanks, Bali 🙂
Michelle @ Sunkissed Kitchen says
Your site is beautiful Char! Looking at some of your top posts today to see what we can do to improve! I have some ideas for next week 🙂
Char says
Thanks so much, Michelle!! I'm looking forward to our chat!
Moshi says
Tasty looking recipe, but the one in your recipe is ebi fry. Ebi fry and ebi tempura are different dish.
Char says
Thank you for the clarification, Moshi!! I've included this info in the text. Cheers!
Poodle Lucy says
Love it and hubby does, too! I didn't have dashi so substituted miso powder and, because we love spicy food, I added some sriracha sauce and wasabi to the sauce. What can I say except every little bit got eaten! Thanks for a great recipe!
Char says
Thanks so much for giving the recipe a try, Lucy! Your sauce sounds amazing!! Thanks again!
David says
Recipe looks great. Well written. Nice photographs. Very misleading title! This is not "Shrimp Tempura". This is breaded and fried shrimp. True tempura uses cornstarch or rice flour and little or no wheat flour. Also, with true tempura you do not coat the shrimp with crumbs or Panko after the batter dip...
Char says
Thanks for this feedback, David! I've edited the title of this post so it's not misleading.