
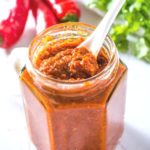

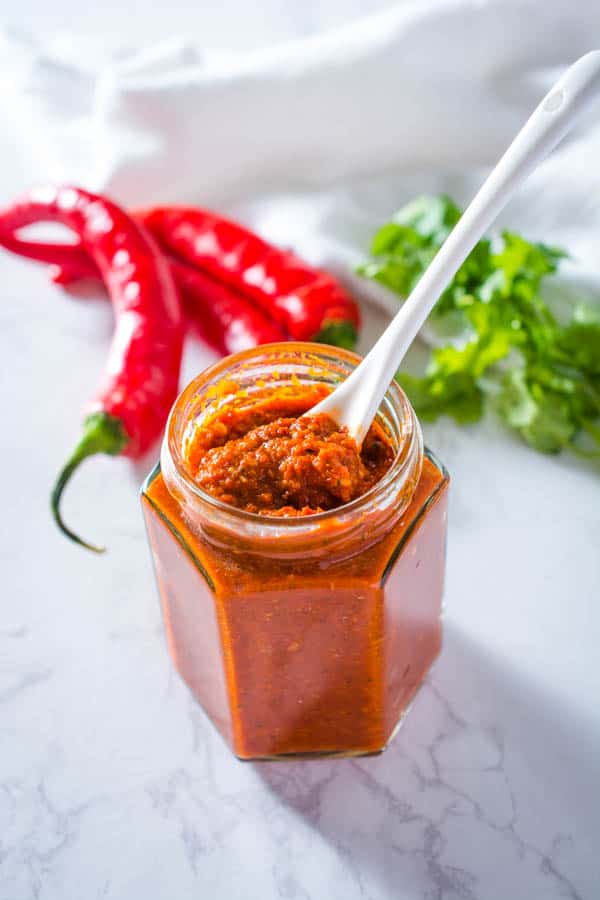
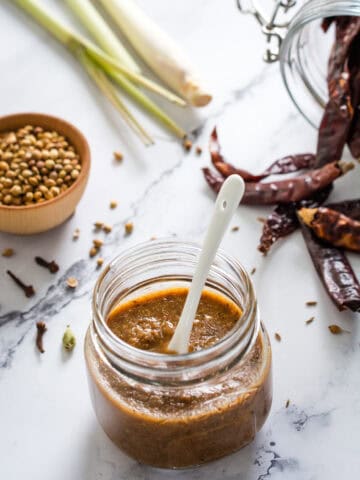
This Thai red curry paste comes together quickly with dried red chilies, lemongrass, and warm spices blended into a rich, aromatic base. A little prep is all it takes to have homemade curry paste ready whenever a craving hits.
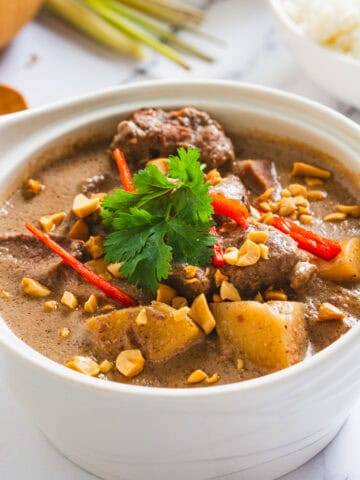
Thai curries are a staple in Thai cooking, and red curry is one of the most familiar and versatile. When spooned over rice, it’s sooo satisfying and the kind of meal that feels comforting without being heavy.
Thai red curry gets its signature color and heat from dried red chilies, along with classic Thai aromatics like lemongrass and galangal. When blended together, these ingredients form a bold, fragrant paste that’s rich, savory, and just spicy enough.
Making your own Thai red curry paste at home is easier than you might think. With just a bit of prep, you’ll have a fresh, homemade paste ready to use whenever the craving hits.
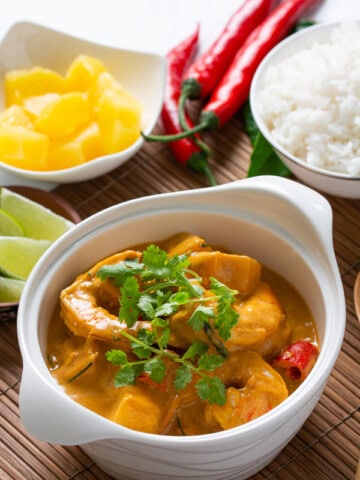
Just add coconut milk, your choice of protein, and a few vegetables, and you’ve got a simple Thai red curry you can pull together even on a busy weeknight.
How to Make Homemade Thai Red Curry Paste
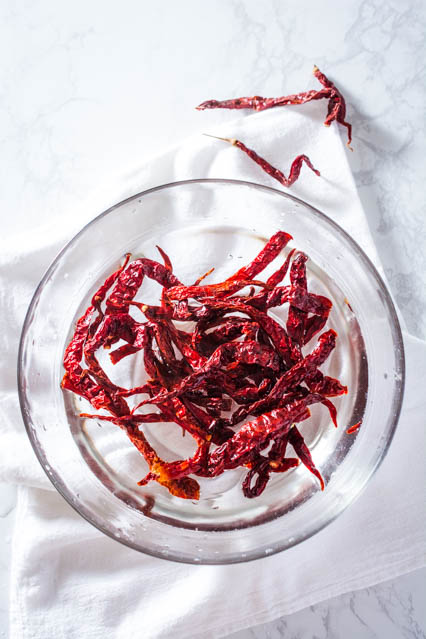
Rinse and soak 15 - 20 (about 2 cups) dried red chilies in warm water for about 30 minutes.
Once the chilies are pliable, remove them from the water and cut them into approximately 1-inch pieces. As you cut the chilies, gently shake the seeds out of each piece. It helps to do this over the kitchen sink, as the chili seeds will tend to fly everywhere.
Traditionally, a mortar and pestle are used to grind all these ingredients into a paste, but it takes a very long time and a lot of effort. Even modern Thai kitchens are using blenders and food processors for convenience nowadays.
Using a blender will yield a much smoother paste. I use a Magic Bullet blender and find it works quite well for this task.
Place the cut dried red chili into a food processor or a blender along with the following ingredients:
- 2 fresh red chilies - cut into approx ½ inch pieces, seeds removed
- 3 stalks lemongrass (only the white portion, thinly sliced)
- 1 inch galangal, grated. (If you are not able to find galangal at your local Asian supermarket, you may substitute this with an equal amount of ginger)
- 5 cloves garlic, peeled
- 4 shallots (small), peeled
- 3 stalks fresh cilantro
- 3 kaffir lime leaves, julienned
- 1 tablespoon coriander seeds
- 2 teaspoons ground cumin
- 2 teaspoons white peppercorns
- 1 teaspoon Thai shrimp paste (optional but recommended)

Keep about 1 cup of water nearby, but don’t add it all at once.
Pulse the mixture a few times to break everything down, then add water gradually, about a tablespoon at a time, until the ingredients blend into a thick, cohesive paste. I usually use ½ to ¾ cup of water, depending on the blender.
Would you like to save this?
This recipe yields about 1 cup of Thai red curry paste, which is enough for multiple curries or to portion and freeze for later.
Storing Thai Red Curry Paste
Your homemade Thai Red Curry Paste will keep in the fridge for up to 1 week or in the freezer for about 6 months.
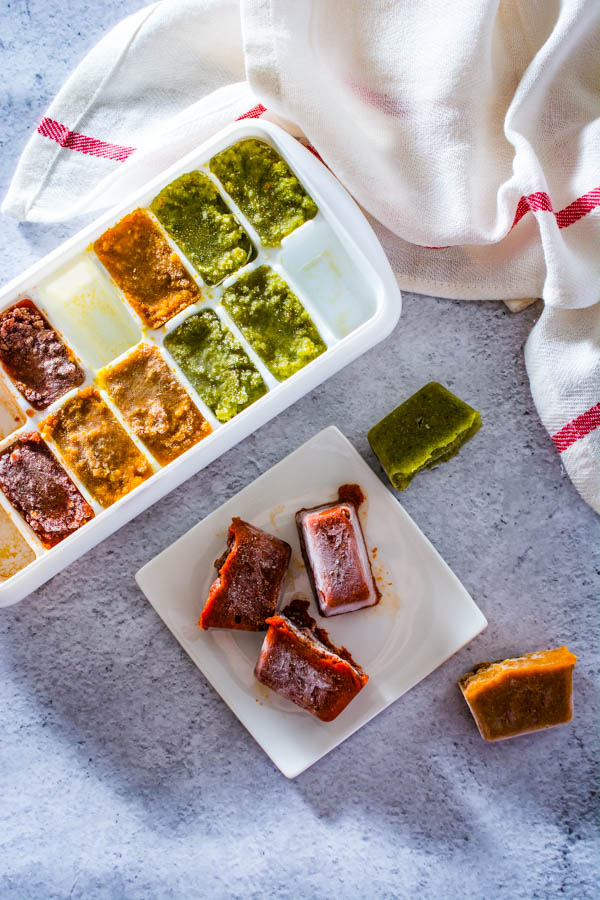
When freezing any curry paste, I recommend using ice cube trays. The ice cube trays with lids are especially handy, since they stack easily and help prevent freezer smells from getting in and keep strong curry smells from spreading in the freezer.
Portioning the paste before freezing also makes it much easier to grab exactly what you need later. Most Thai curry recipes call for about 2 to 3 tablespoons of curry paste, so I like to freeze it in 1-tablespoon portions. This way, you can pop out just a few cubes and adjust the amount depending on how bold or spicy you want your curry.
1 cup is 16 tablespoons, so you will get about 16 individual frozen Red Curry Paste cubes per batch.
You could store these cubes in the ice cube trays, or put the frozen curry paste cubes into a Ziploc bag to save space in your freezer.
💡 Pro Tips for the Best Thai Red Curry Paste
- Control the heat by adjusting the chili seeds. Most of the heat comes from the chili seeds. Removing most of them gives you a balanced, flavorful paste, while leaving more seeds in will make it spicier. If you’re unsure, start mild. You can always add heat later.
- Slice aromatics thinly for easier blending. Lemongrass and galangal can be quite fibrous. Cutting them into very thin slices helps your blender or food processor break everything down more evenly.
- Add water gradually, not all at once. It’s tempting to pour in water to get things moving, but adding it slowly gives you better control over the texture. The goal is a thick paste, not a runny sauce.
- Scrape down the sides often. Curry paste ingredients love to cling to the sides of the blender. Pausing every few seconds to scrape down the mixture ensures a smoother, more evenly blended paste.
Frequently Asked Questions
Yes. Shrimp paste adds depth and savoriness, but you can leave it out if needed. The curry paste will still be flavorful, just a bit lighter in umami. If you want to compensate, a small splash of fish sauce may help when cooking the curry later.
Fresh red chilies alone won’t give you the same depth or color. Dried chilies are essential for the classic flavor and richness of Thai red curry paste. Fresh chilies are best used alongside dried ones to adjust heat and brightness, rather than as a full replacement.
This usually comes from tougher aromatics like lemongrass or galangal. Slicing them very thinly and blending patiently makes a big difference. Using a high-powered blender also helps, but even with a standard blender, stopping to scrape the sides and adding water gradually improves the texture.
That said, a slightly coarse or textured paste isn’t a bad thing. Some people actually prefer a bit of texture, as it gives the curry more body and character. How smooth your curry paste needs to be really comes down to personal preference.
The heat level can vary a lot depending on the chilies and how many seeds you remove. Some dried chilies are naturally spicier than others, even within the same type. This homemade version is customizable. For a milder paste, remove most of the seeds. For more heat, leave some seeds in or add an extra fresh chili.
Yes. Thai red curry paste freezes very well for up to 6 months. Freezing it in small portions, makes it easy to use straight from the freezer. You can let the paste thaw at room temperature, or add it directly to the pan and let it melt as you cook.
Other Thai Curry Paste Recipes:
Red Curry Recipes to try:
Try these Thai Red Curry recipes with your new homemade paste!
- Easy Thai Red Curry Shrimp
- Red Curry Baked Potato
- Red Curry Sweet Potato and Lentil Soup by From a Chef's Kitchen
- Grilled Thai Red Curry Chicken by Chef in the Burbs
- Spicy Thai Shrimp Soup by West via Midwest
- Thai Turkey Zucchini Meatballs by The Gingered Whisk
- Thai Red Curry Chicken with Vegetables by Lemon Blossoms
Thai Red Curry Paste
Ingredients
- 15 - 20 dried red chili approx 2 cups
- 2 fresh red chilies cut into ½ inch pieces, seeds removed
- 3 stalks lemongrass only the white portion, sliced
- 5 cloves garlic peeled
- 4 shallots small, peeled
- 1 inch galangal grated (substitute with ginger)
- 3 stalks cilantro
- 3 kaffir lime leaves julienned
- 1 tablespoon coriander seeds
- 2 teaspoons ground cumin
- 2 teaspoons white peppercorns
- 1 teaspoon Thai shrimp paste optional but recommended
- 1 cup water
Instructions
- Soak the dried red chilies in warm water for 30 minutes.
- Remove soaked chilies from the water, cut into 1-inch pieces. Remove the seeds as you cut the chilies.
- Place cut chilies into a blender or food processor, along with fresh red chilies, lemongrass, galangal, garlic, shallots, cilantro, kaffir lime leaves, coriander seeds, cumin, white peppercorns, and Thai shrimp paste (if using).
- Pulse it a few times, then slowly add about a tablespoon of water at a time to blend the ingredients to a paste. (As soon as you get the consistency you want, stop adding water).
Kathy says
What a great recipe. I always wanted to make my own homemade red curry past but didn't know how. Thank you so much! I will make this at home from now on.
Char says
Thanks, Kathy! I hope that you enjoy this recipe! 🙂
Steven VanAernem says
This looks like another amazing recipe i will be trying very soon.
Thank you for keeping them coming, I look forward to what you will post next.
Char says
Thank you, Steven!! 🙂