


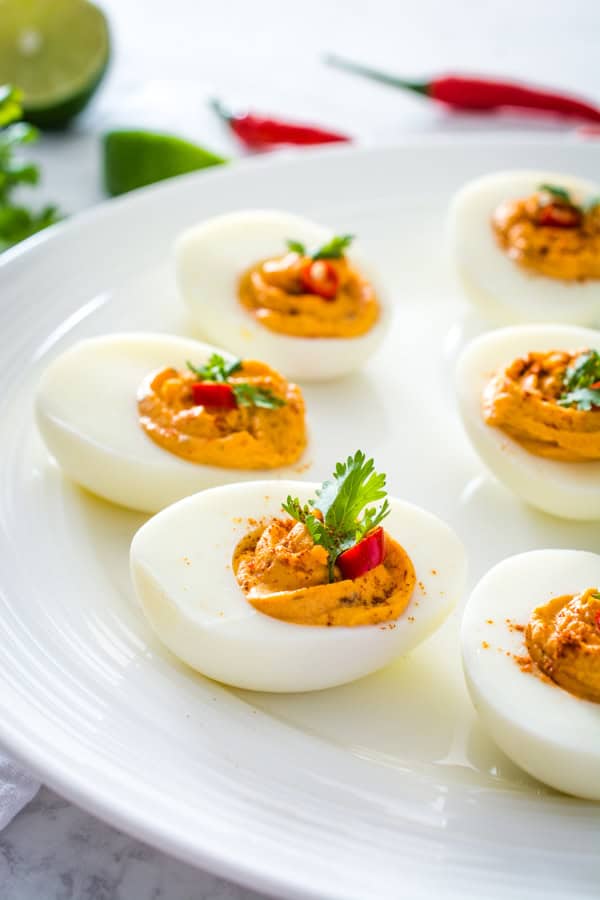
These Thai Red Curry Deviled Eggs deliver everything you love about deviled eggs, and elevated with the amazing and aromatic flavors of spicy Thai Red Curry!
Deviled Eggs are an appetizer that many (including myself) find very hard to resist. They are so creamy and flavorful! The perfect finger-food appetizer.
These Thai Red Curry Deviled Eggs will give you everything you that love in deviled eggs, and elevated to the next level with the spice and amazing flavors of Thai Red Curry. They are sure to be a hit at your next party or potluck!
These Thai Curry Deviled Eggs are incredibly easy to prepare and they are also healthy so you can snack away guilt-free!
How to boil eggs for Deviled Eggs
As hard-boiled eggs are the star ingredient in this dish, you will want to make sure that your hard-boiled eggs look great and are super-easy to peel.
I'll include two different methods for hard-boiling your eggs below: the first option is to use an Instant Pot, and the second option is the boil them on your stovetop.
Regardless of which method you choose, it's best to use eggs that are at room temperature to prevent cracking. Take them out from the fridge approximately 30 minutes before boiling them.
Also, eggs that are too fresh will not be very easy to peel when hard-boiled. Older eggs have a slightly higher pH so the cooked egg-white will not stick to the eggshell membrane as easily. Make sure you are using eggs that are about 7 to 10 days old, especially if you are using the stovetop method.
Instant Pot Hard-Boiled Eggs
Making hard-boiled eggs in an Instant Pot will almost always guarantee perfect hard-boiled eggs that are very easy to peel.
I personally use the 5-5-5 method to hard-boil eggs in my Instant Pot:
Place the eggs on a steaming rack. I use a silicone egg rack for the Instant Pot, or you may also use the stainless-steel steaming rack that comes in your Instant Pot kit.
Fill the pot with one cup of water, then pressure-cook on High for 5 minutes.
After they have cooked for the 5 minutes, Allow the eggs to sit in the Instant Pot for another 5 minutes, then press the quick-release button. When the pin drops, open the lid and remove the eggs from the Instant Pot using a pair of silicone tongs.
Immediately transfer the eggs to a bowl filled with ice-cold water, then let them sit in the cold water for another 5 minutes before you peel the eggs.
Stovetop Hard-Boiled Eggs
Bring a pot of water to boil over high heat, then add 1 tablespoon of baking soda to the water. The baking soda is the secret ingredient that will make it very easy to peel the shell off the eggs!
As soon as the water reaches a rolling boil, gently lower the eggs using a large spoon or a spider skimmer.
Immediately reduce the heat to medium-low to bring the water down to a simmer. While the eggs are cooking, prepare an ice bath for the eggs in a large bowl.
Allow the eggs to cook for 12 minutes, then use a large spoon or spider skimmer to transfer the eggs to the ice bath.
Let the eggs sit in the ice bath for about 5 minutes before you peel them.
How to Make Thai Red Curry Deviled Eggs
You will need 6 hard-boiled eggs for this recipe.
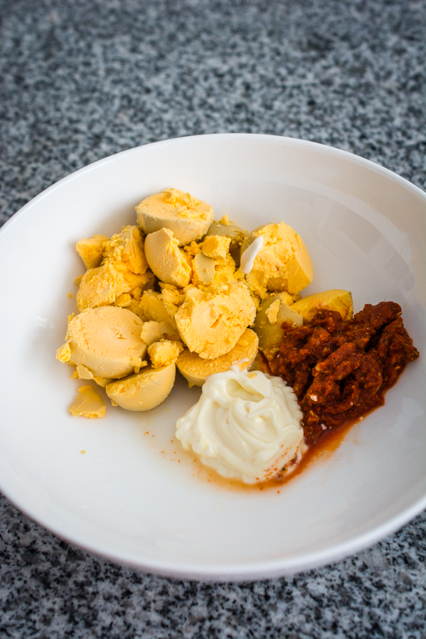
Carefully slice each egg in half lengthwise with a very sharp knife, then remove the yolks from the egg whites using a small teaspoon.
Place all of the egg yolks in a medium-sized mixing bowl. To the egg yolks, add 2 tablespoons of mayonnaise, 1 tablespoon of coconut oil, 3 teaspoons of Thai Red Curry Paste (homemade or storebought), 2 teaspoons of lime juice, and a dash of salt and pepper to taste.
Would you like to save this?
Use a large spoon to mash the yolks and stir the egg yolk mixture until all of the ingredients are thoroughly combined.
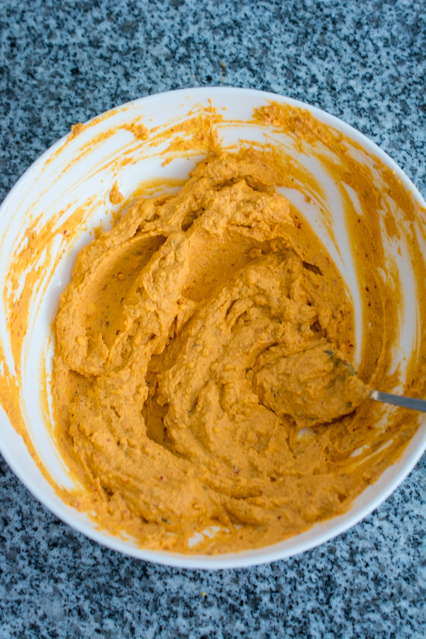
Scoop the red curry egg yolk mixture into a piping bag fitted with any fairly large nozzle of your choice (the star nozzles are a good option for any sort of deviled egg).
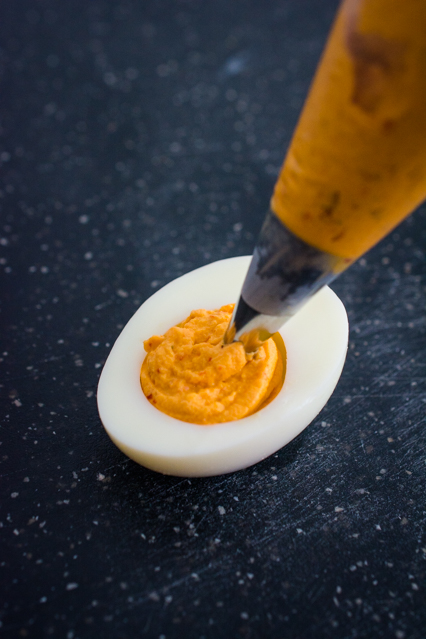
Fill each egg white half with approximately one tablespoon of the red curry egg yolk mixture.
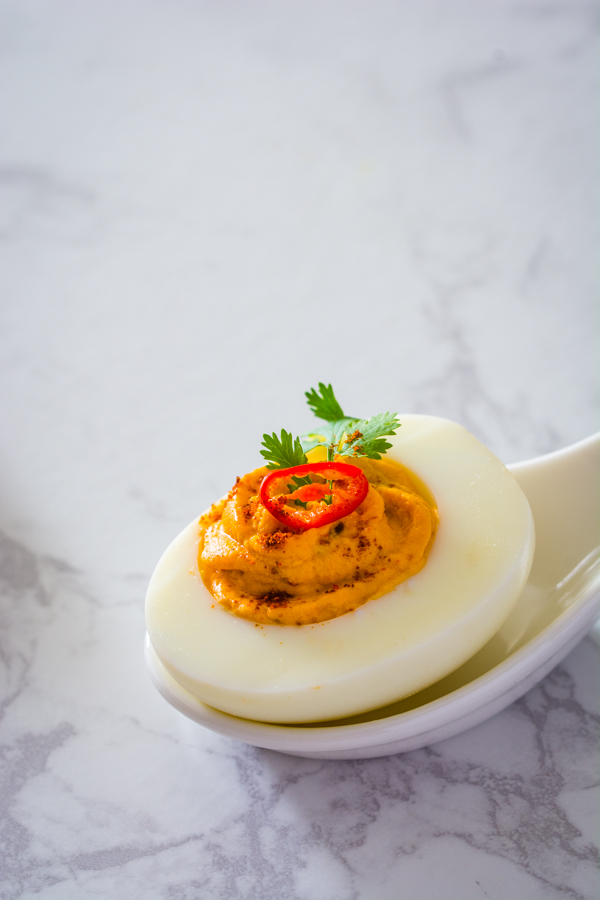
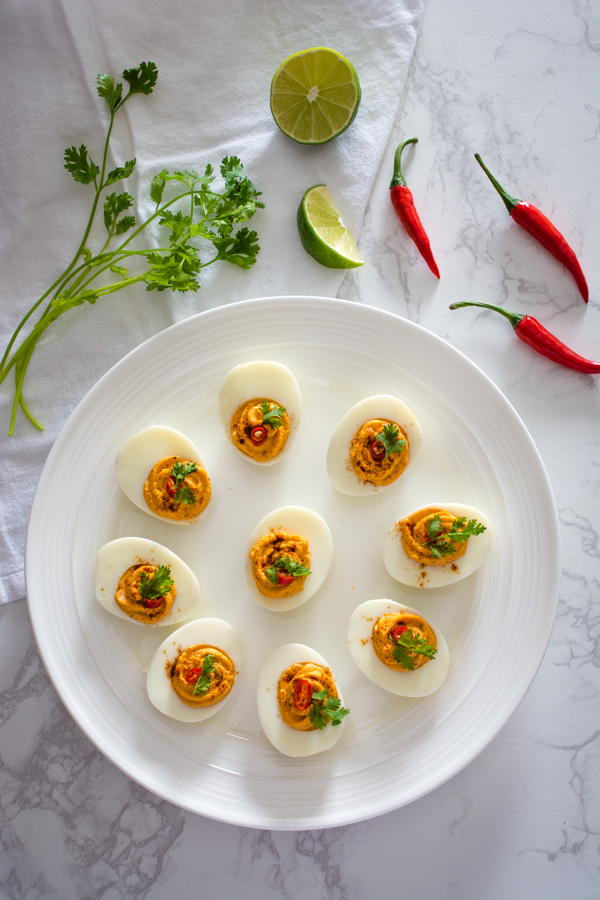
Just before serving these delicious Thai Red Curry Deviled Eggs, garnish them with a small sprinkle of paprika, a cilantro leaf, and a slice of fresh red chili if desired.
Enjoy!
Making Deviled Eggs Ahead of Time
When preparing for a party or a potluck, it's a great idea to prepare what you can ahead of time so that you're not scrambling around at the last minute doing a million things at once.
These Thai Red Curry Deviled Eggs are perfect in these situations because you can make them ahead of time.
The prepared ingredients for these deviled eggs can be stored for up to two days in the refrigerator. (Not the freezer!)
Store the hard-boiled egg whites in an air-tight container or a large Ziploc bag, and the Thai Red Curry egg yolk mixture separately in a piping bag, and keep them in the fridge.
When you are ready to put the deviled eggs together, take the Red Curry egg-yolk mixture out of the fridge and let it sit at room temperature for about 30 minutes (to allow it to soften slightly) before piping it into the egg whites.
How Long Can You Keep Deviled Eggs?
Deviled Eggs can be stored for up to 2 days if kept in the fridge.
As hard-boiled eggs are perishable, try to minimize the time that they spend at room temperature.
If you prepared the deviled egg ingredients ahead of time (as described in the paragraphs above), this will shorten the time that you can keep any leftovers in the fridge. So if you prepared the ingredients two days ahead of time, you will not be able to keep any leftovers.
I'm quite certain that leftovers for these Thai Red Curry Deviled Eggs will be quite rare anyways!
Thai Red Curry Deviled Eggs
These Thai Red Curry Deviled Eggs deliver everything you love about deviled eggs, and elevated with the amazing and aromatic flavors of spicy Thai Red Curry!
Ingredients
- 6 large eggs
- 2 tablespoons mayonnaise
- 1 tablespoon coconut oil
- 3 teaspoons Thai Red Curry Paste
- 2 teaspoons lime juice
- Salt and pepper to taste
- Paprika garnish
- Cilantro leaves garnish
- Sliced fresh red chili garnish
Instructions
Instant Pot Hard-boiled Eggs:
- Place a steaming rack in the Instant Pot, then carefully place the eggs on the rack.
- Fill the Instant Pot with 1 cup of water.
- Pressure-cook on High for 5 minutes.
- Leave the eggs in the Instant Pot for another 5 minutes, then press the quick-release button. While waiting, prepare an ice bath for the eggs in a large bowl - fill the bowl with cold tap water and add about 2 cups of ice.
- When the pin drops, open the lid and remove the eggs from the Instant Pot using a pair of silicone tongs and transfer them to the ice bath.
- Allow the eggs to sit in the ice bath for 5 minutes before peeling.
Stovetop Hard-boiled Eggs:
- Bring a pot of water to boil over high heat, then add 1 tablespoon of baking soda to the water.
- As soon as the water reaches a rolling boil, gently lower the eggs using a large spoon or a soup/spider skimmer.
- Immediately reduce the heat to medium-low to bring the water down to a simmer. While the eggs are cooking, prepare an ice bath for the eggs in a large bowl.
- Allow the eggs to cook for 12 minutes, then use a large spoon or soup/spider skimmer to transfer the eggs to the ice bath. Let the eggs sit in the ice bath for about 5 minutes before peeling.
Thai Red Curry Deviled Eggs
- Peel all of the eggs, slice each egg in half (lengthwise), then remove the yolks from the egg whites using a small teaspoon.
- Place the egg yolks in a medium-sized mixing bowl. Add the mayonnaise, coconut oil, Thai Red Curry Paste, lime juice, and salt and pepper.
- Use a large spoon to mash the yolks and stir the egg yolk mixture until all of the ingredients are thoroughly combined.
- Scoop the red curry egg yolk mixture into a piping bag fitted with a large nozzle.
- Fill each egg white half with approximately one tablespoon of red curry egg yolk mixture.
- Garnish with a light sprinkle of paprika, a cilantro leaf and a slice of fresh red chili. Enjoy!
Notes
Try these other Thai curry dishes:


[…] Thai Red Curry Deviled Eggs […]