

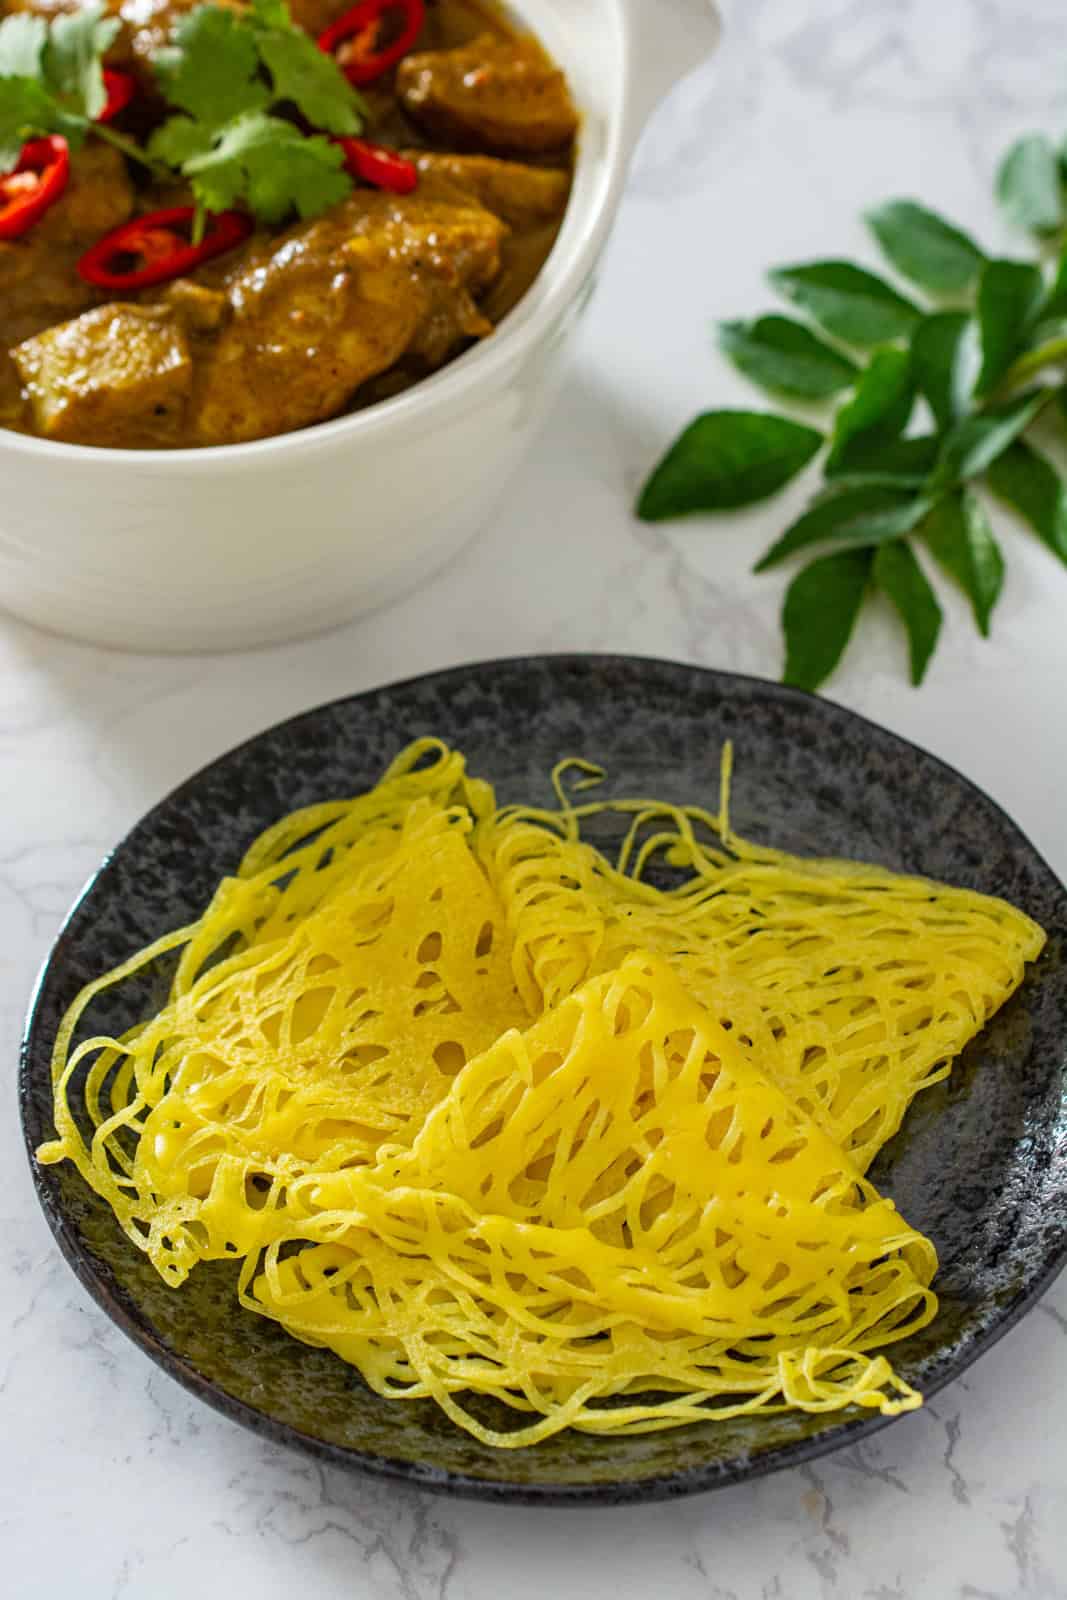
Roti Jala, or Malaysian lace pancakes, are delicate, lace-patterned crepes that pair perfectly with curry, and they’re surprisingly easy to make at home.
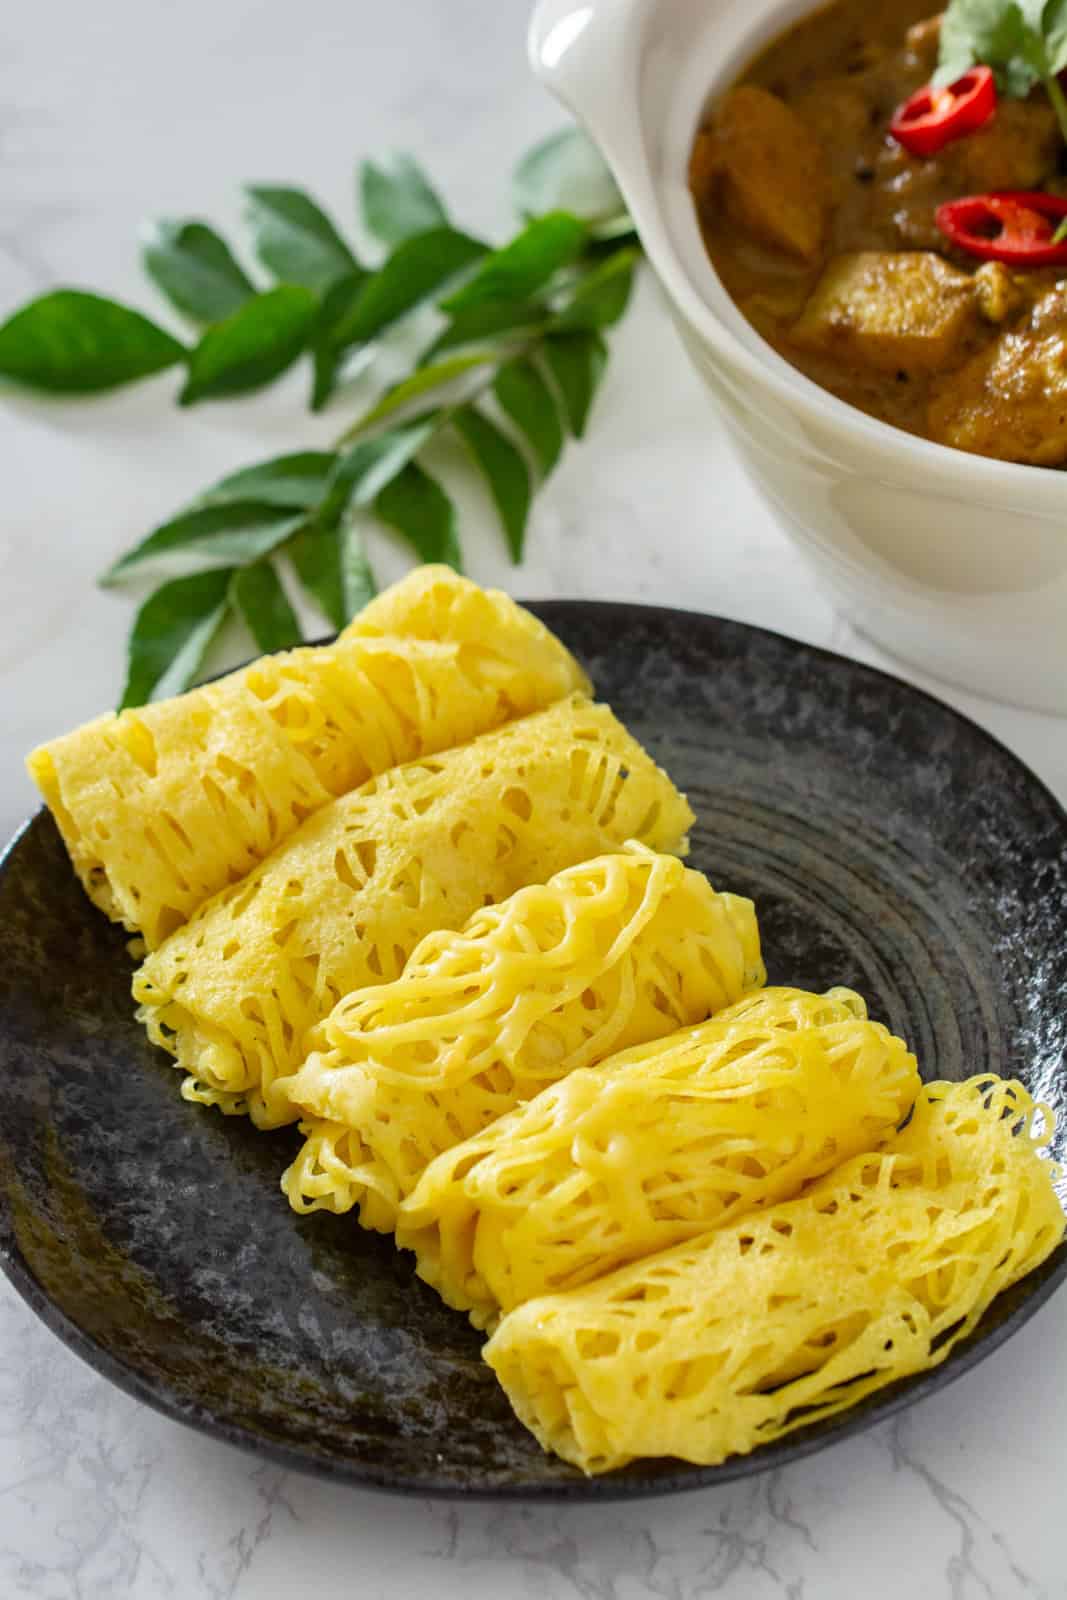
If you’ve ever had Malaysian Chicken Curry, you might have seen it paired with Roti Jala - soft, lacy crepes that are perfect for soaking up all that flavorful sauce.
The name roti jala translates to “net bread,” named for the crepe’s delicate pattern, which resembles fishing nets.
I always thought they’d be complicated to make; they look so intricate! But once I finally gave it a try, I was surprised by how easy the process actually is.
While Roti Jala is most often paired with Malaysian curries, it’s actually quite versatile. Basically, if it’s saucy and comforting, it’ll probably be delicious with Roti Jala.
How to Make Roti Jala
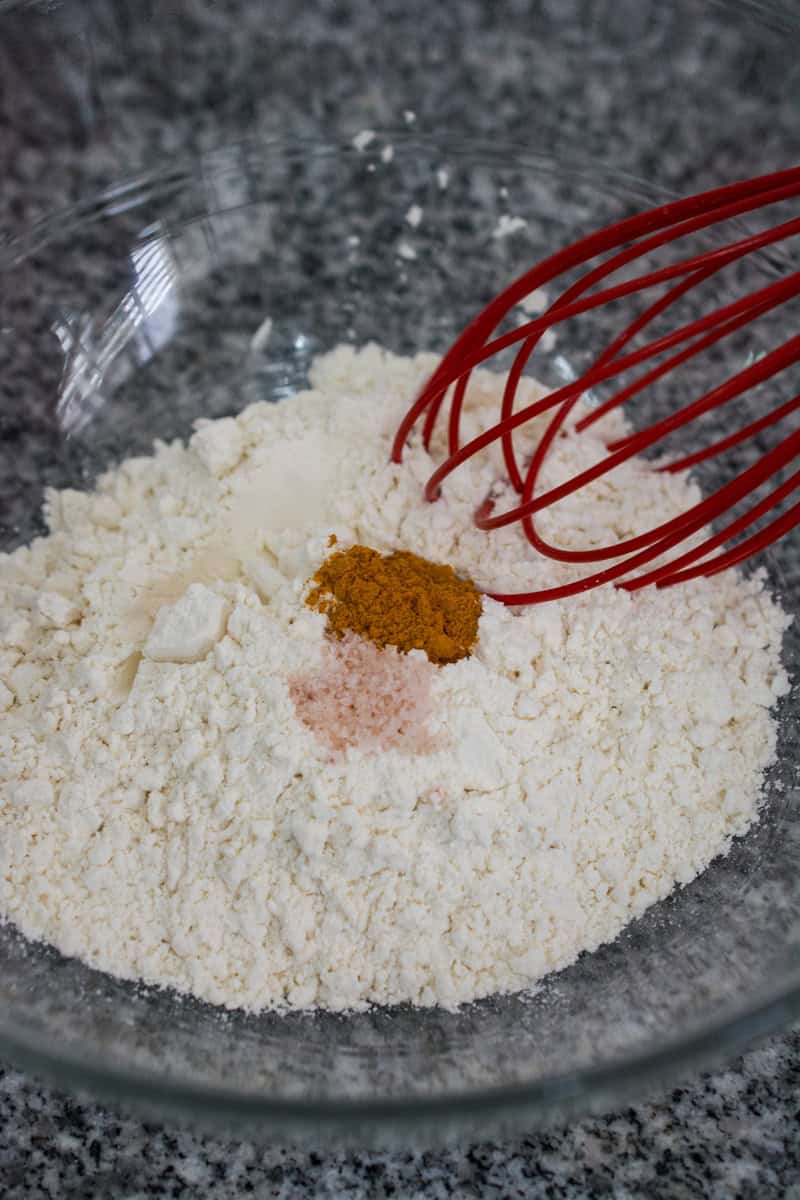
In a large mixing bowl, whisk together 1 cup of all-purpose flour, ⅛ teaspoon of ground turmeric, and ½ teaspoon of salt. If you prefer a touch of sweetness, feel free to add ½ teaspoon of sugar too.
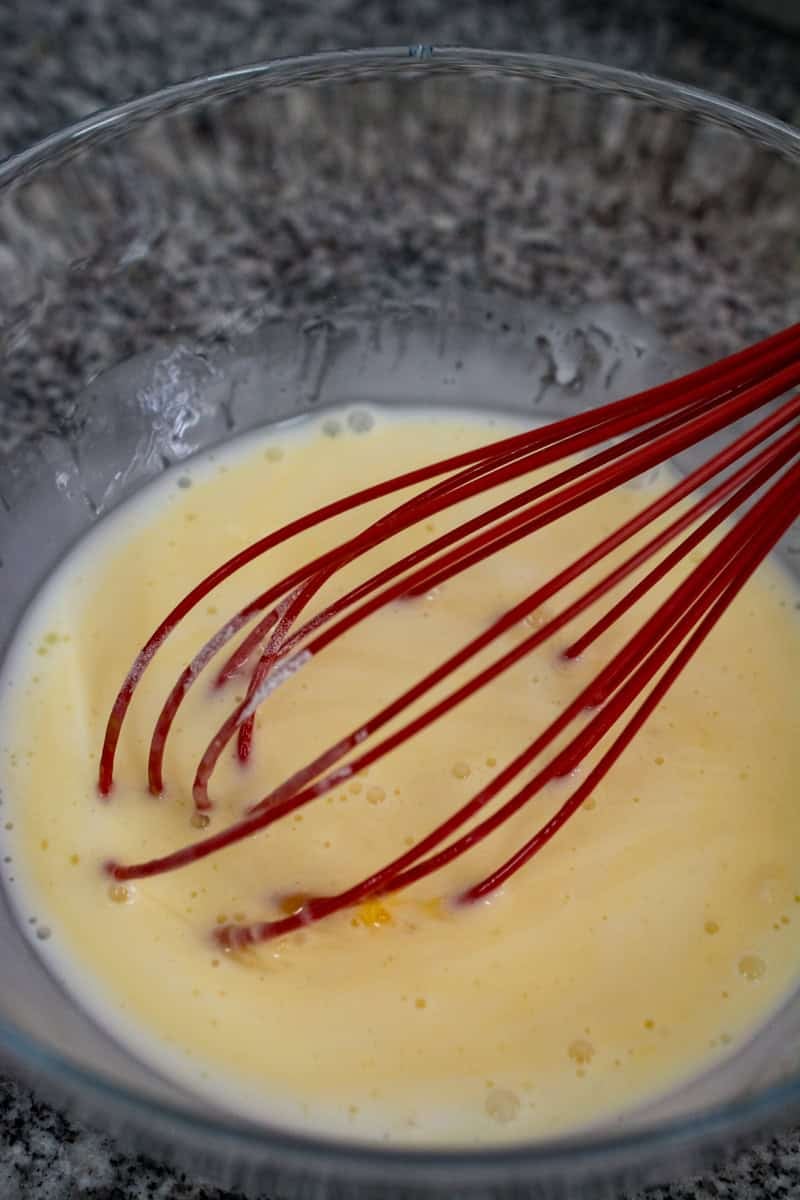
In a separate bowl, beat 1 egg, then stir in ¾ cup of coconut milk, ½ cup of water, and 1 tablespoon of coconut oil.
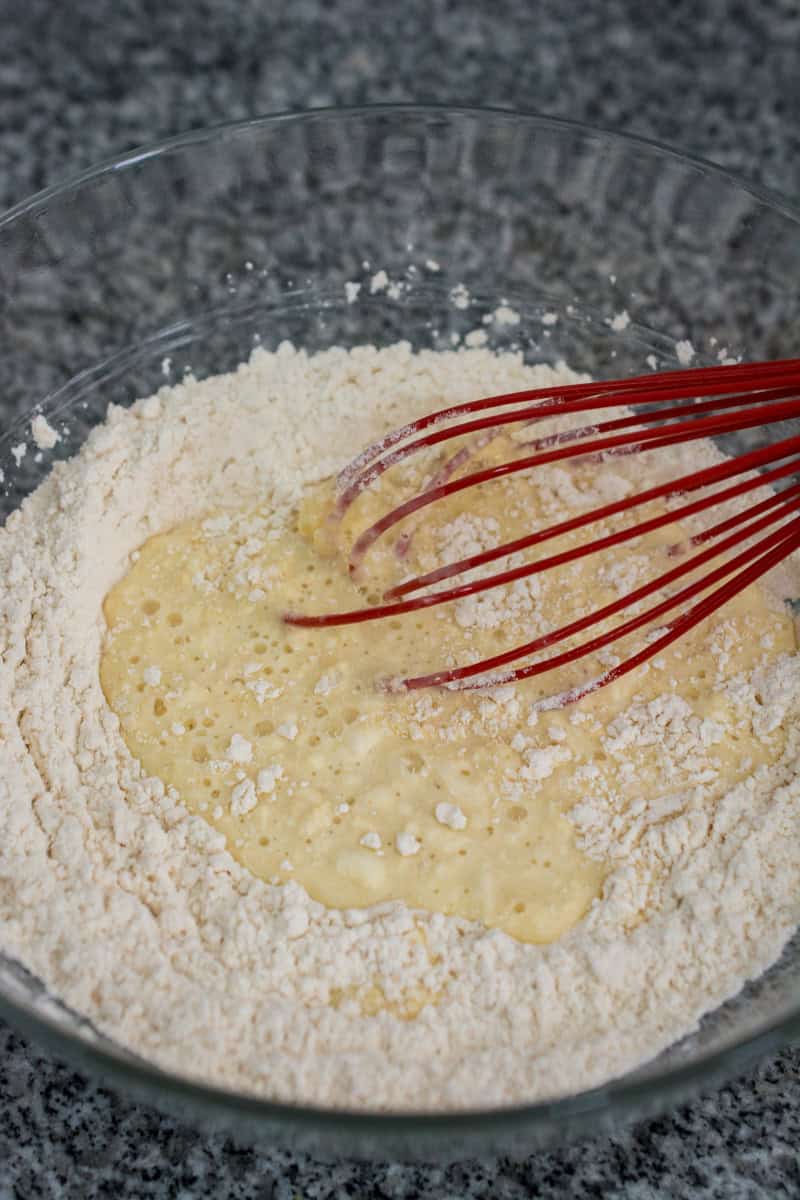
Slowly pour the wet ingredients into the dry ingredients, whisking as you go until you have a smooth, pourable batter (the consistency should be similar to whipping cream)
Let the batter rest for about 15 to 30 minutes.
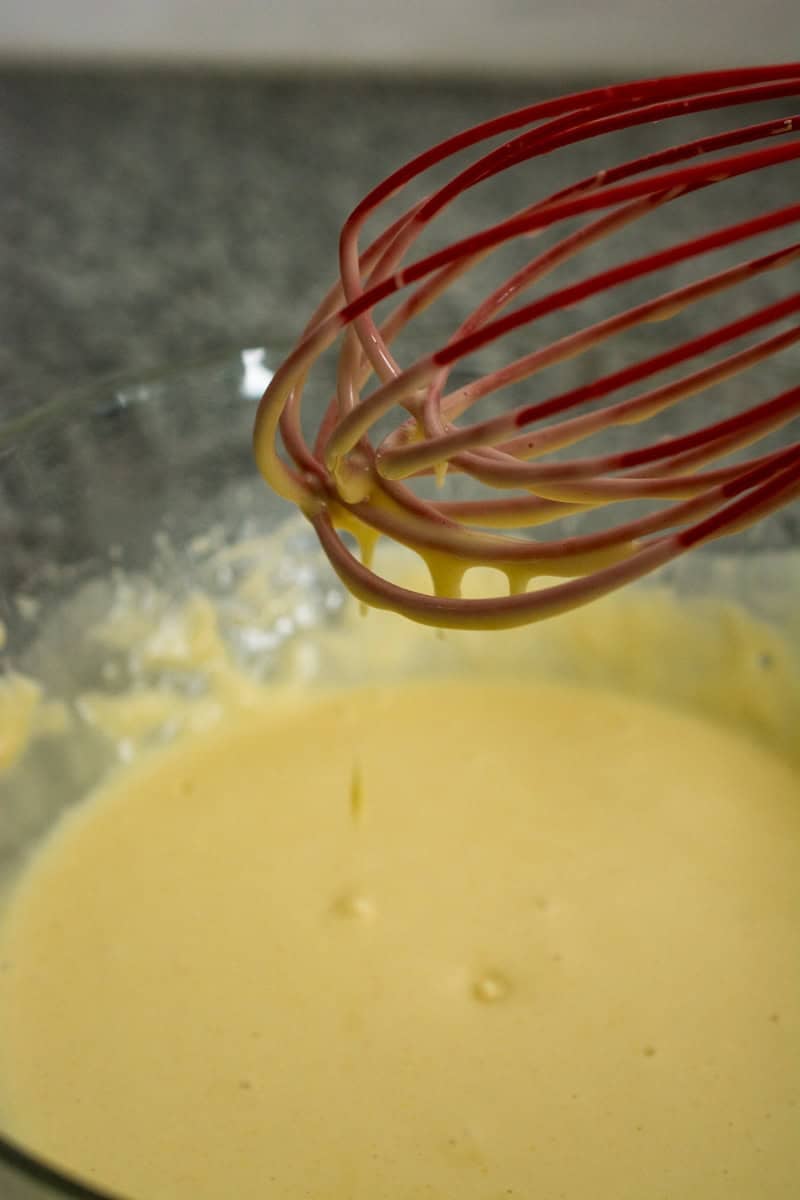
After resting, whisk the batter again, then strain it to catch any lumps. This prevents them from clogging the nozzles and ruining your drizzle.
Pour the batter into a squeeze bottle — ideally one with three nozzles, or a DIY version (more on that below!)
Heat a small non-stick frying pan over medium heat. Add about 2 tablespoons of coconut oil, then use a folded paper towel to spread the oil evenly over the surface.
Working quickly, drizzle the batter in circular, criss-cross motions over the pan to create a lacy pattern that covers the surface.
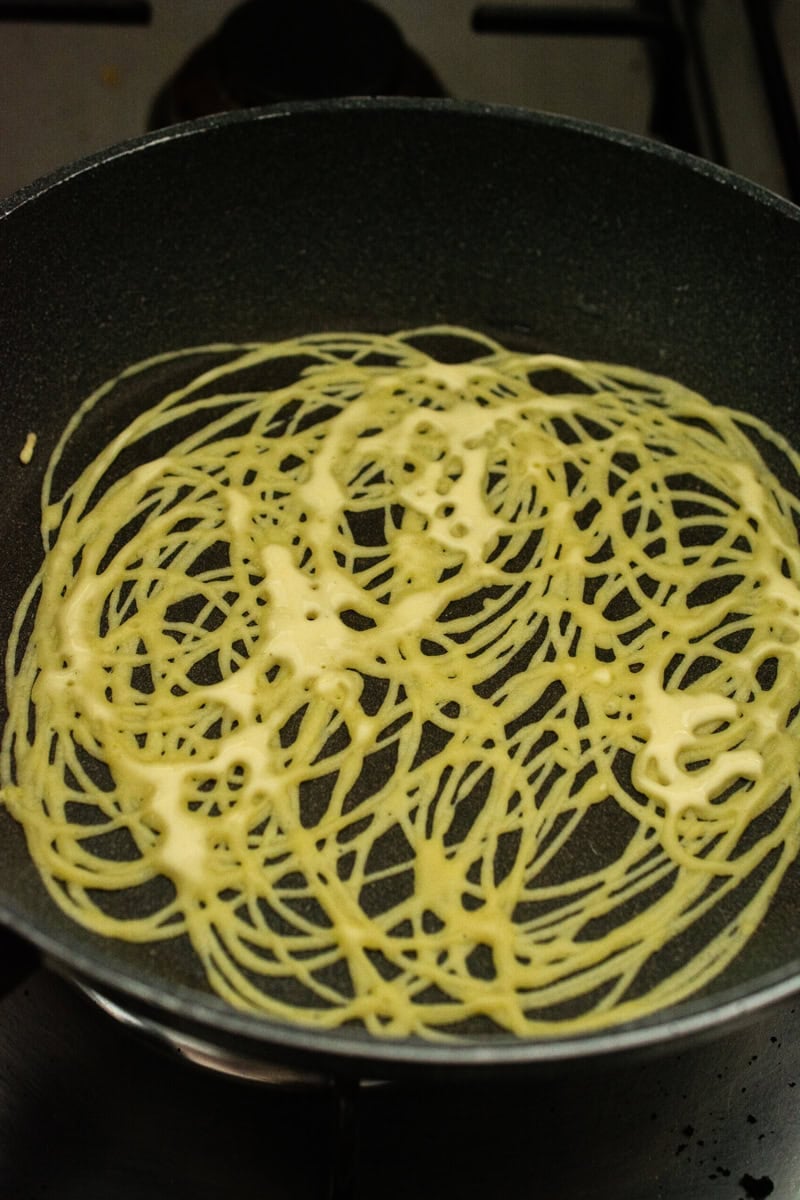
Let the crepe cook for about a minute, or until the surface is fully set and there’s no more wet batter.
You don’t need to flip it! Once cooked, gently lift it out of the pan with a wooden or silicone spatula and transfer to a plate.
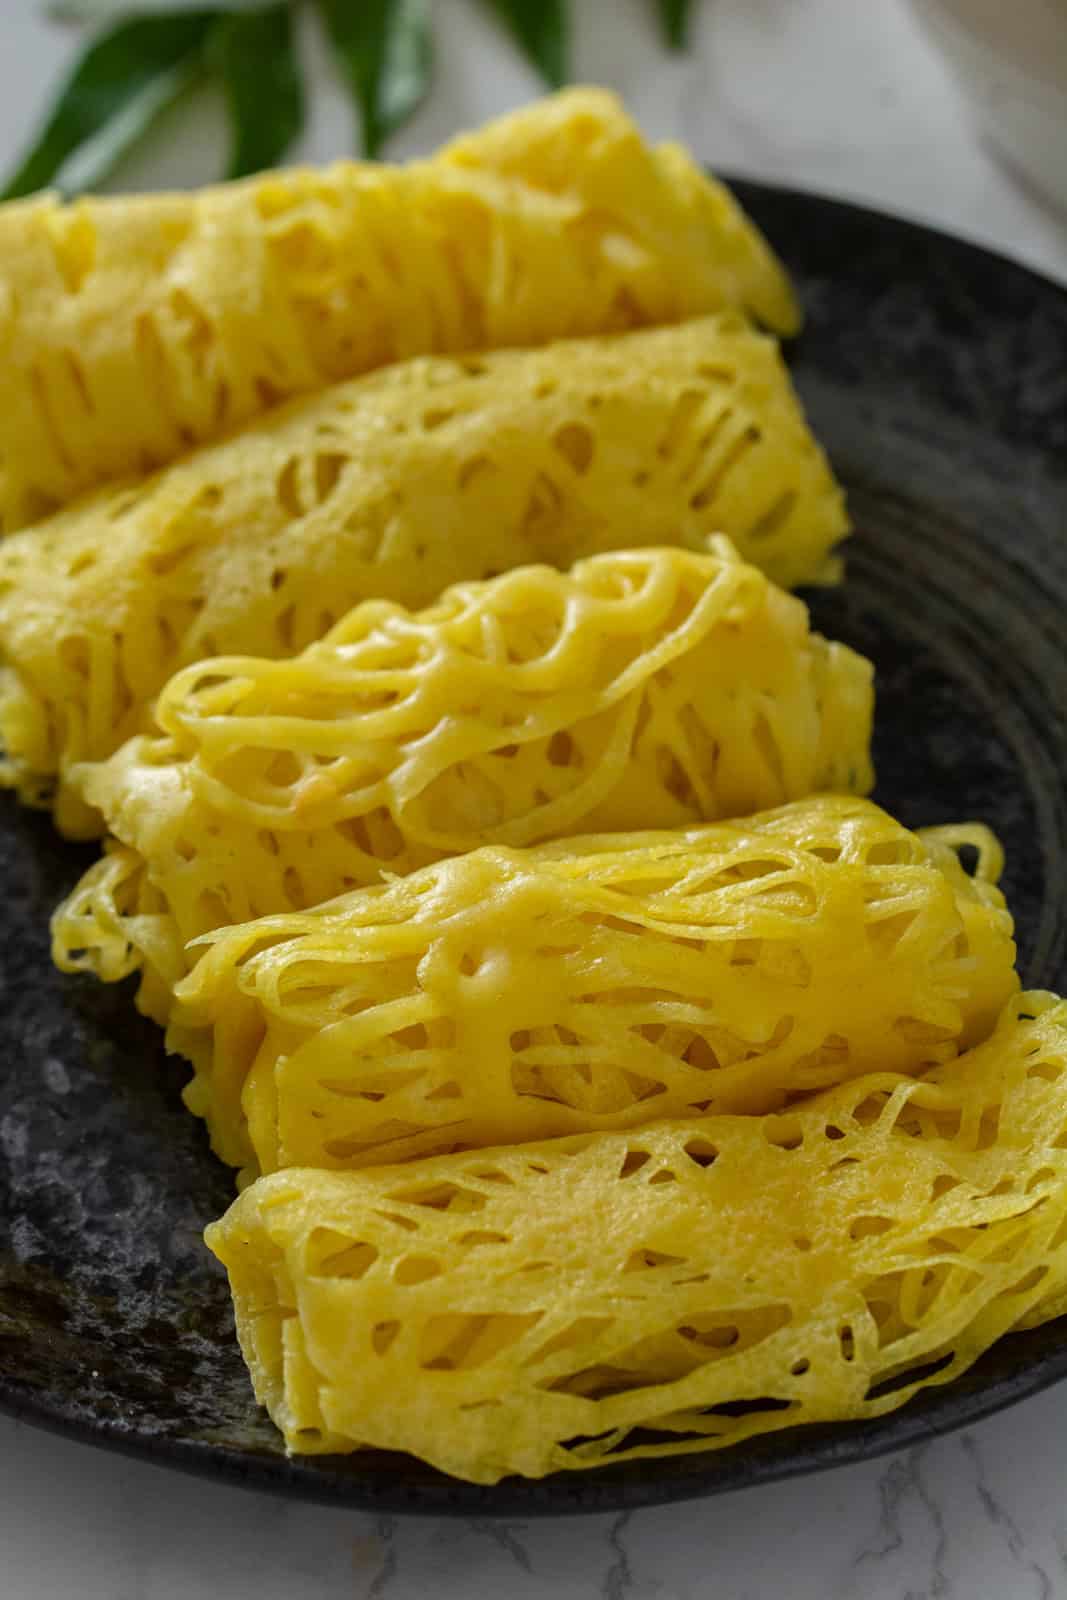
Once it’s cooled slightly, you can either fold it into quarters for triangle-shaped Roti Jala, or fold in the sides and roll it up like a delicate lace scroll.
Roti Jala Tools (and DIY Options)
Roti jala was traditionally made using a multi-spouted cup, but these require a very thin batter to flow properly, and can be quite tricky to control.
These days, squeeze bottles have become the go-to tool for most home cooks because they’re easier to handle and much more forgiving for beginners.
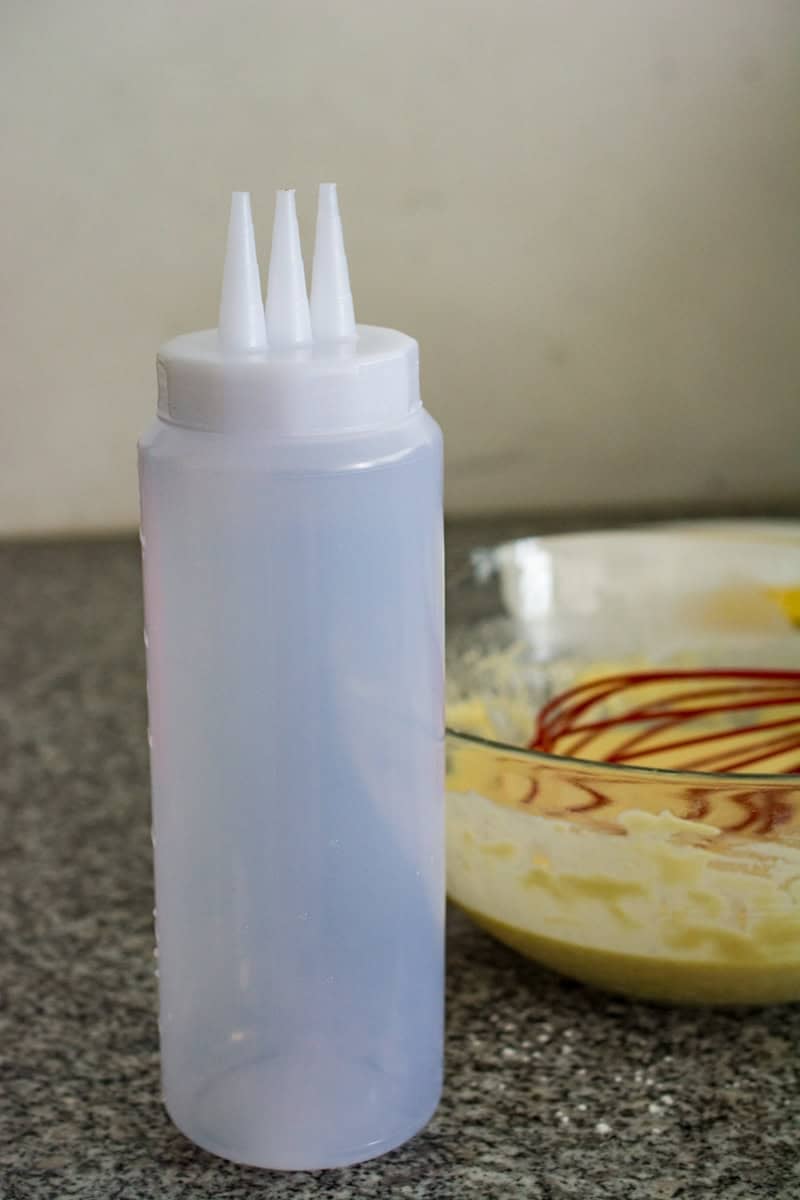
The tool I use is a squeeze bottle with three nozzles. It gives you great control and makes it easy to drizzle the batter in quick, circular motions to create that signature net pattern.
If you don’t have access to a 3-nozzle bottle, here are two easy DIY options that work surprisingly well:
Would you like to save this?
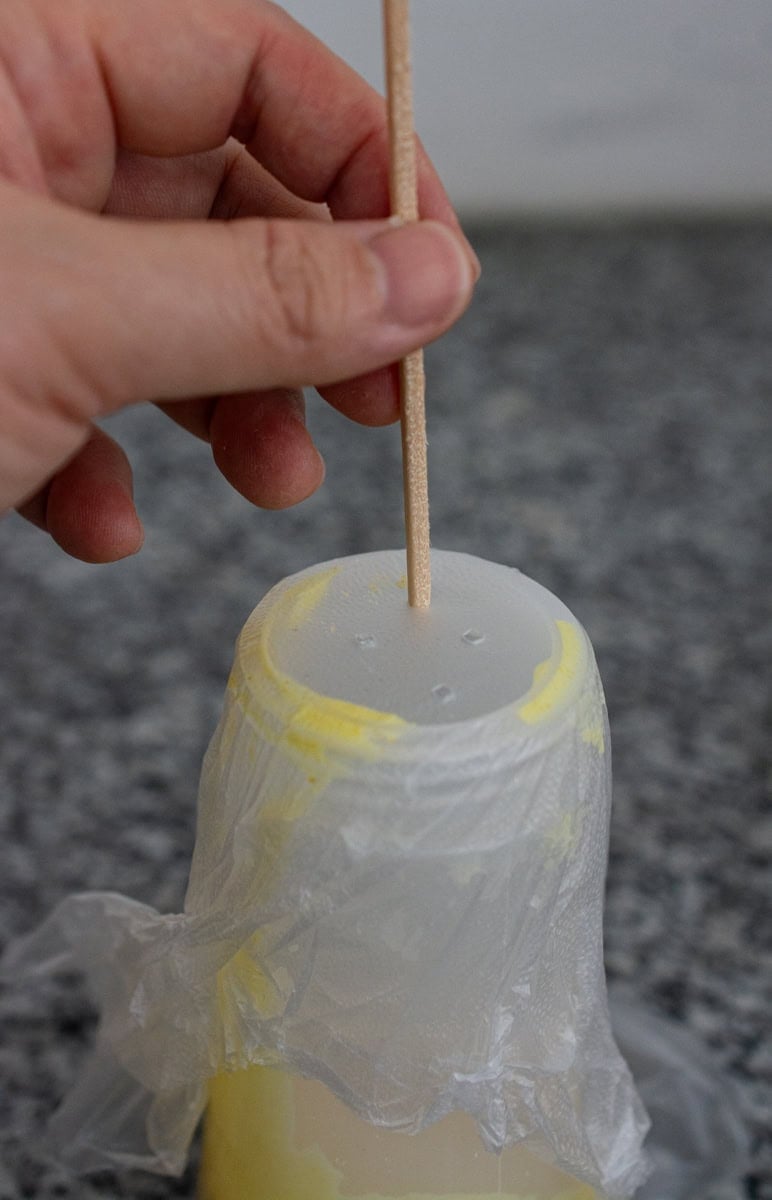
DIY Hack #1 – Press’n Seal Method:
Take a regular squeeze bottle, cover the top with Press’n Seal, and poke three holes using a thick skewer or toothpick. It’s a quick and easy way to get a similar effect without any special tools.
You will need a tight rubber band to hold the plastic seal in place while you’re squeezing the batter.
Press’n Seal has a slightly tacky surface that grips much better than regular plastic wrap, which means it stays securely in place when you’re squeezing the bottle. It also holds up well to pressure and is less likely to tear, making it the perfect choice for this easy DIY roti jala tool.
DIY Hack #2 – Plastic Water Bottle:
Use a clean plastic water bottle and create 2–3 small holes in the cap to make your own makeshift Roti Jala tool. Space the holes evenly for a consistent drizzle.
You can do this by gently tapping a nail through the cap with a hammer, or by heating a metal skewer or nail and carefully melting holes into the plastic.
A smaller bottle (around 500ml) works best because it’s easier to grip and squeeze, giving you better control while drizzling the batter.
💡 Tip: Before using your DIY bottle over the pan, do a quick test drizzle onto a plate or cutting board. This lets you check the flow and make sure the holes are wide enough and gives you a chance to adjust the batter consistency if needed.
How to Fold Roti Jala
Once your Roti Jala has cooled just slightly, it’s time to fold them. There are two popular ways to do this — both are quick and easy, so just go with what feels right to you.
Triangle fold (Classic style):
Fold the crepe in half to make a semi-circle, then fold it in half again to form a triangle. This is the most traditional and often what you'll see served alongside curry.
Rolled style:
Fold two sides of the crepe toward the center, then roll it up like a spring roll. This style is great for stacking and packing into lunch boxes.
There’s no right or wrong here — both folding methods work beautifully, and they’re mostly about presentation and preference. I’ve even seen them folded into rectangles like little pillows.

💡 Pro Tips for the Best Roti Jala
- Don’t skip the straining step. Even a small lump in the batter can clog a nozzle and throw off your drizzle. A fine mesh strainer makes a big difference.
- Test your batter consistency. If it’s too thick, the batter won’t flow well (especially if you’re using the DIY Press n Seal method). If it’s too runny, the net won’t hold its shape. Aim for a pourable consistency similar to heavy cream.
- Use medium heat and work quickly. The batter sets fast, so once you start drizzling, keep your hand moving in a circular or criss-cross motion to create the lace effect.
- Keep the pan clean. Make sure the surface is wiped clean between each crepe (if needed). Any leftover batter can affect the shape and texture of the next one.
Frequently Asked Questions
Yes! You can prepare the batter up to a day in advance. Just give it a good stir (or whisk) before using, and don’t forget to strain it.
A small non-stick frying pan works best. It helps the lacy batter release cleanly and cook evenly without sticking.
Stack the crepes with parchment paper between each layer to prevent them from sticking, then store in an airtight container. They’ll keep in the fridge for up to 3 days.
For longer storage, you can freeze them the same way — just thaw and reheat gently in a steamer or microwave when ready to serve.
Roti Jala is traditionally served with chicken curry — the soft, lacy crepes are perfect for soaking up all that rich, flavorful sauce. It also pairs beautifully with beef rendang, dhal, or any vegetable curry. You can even serve it as part of a Malaysian-style platter for brunch or gatherings.
You can even enjoy it with Thai curries like red, green, or yellow curry — the coconut-based sauces work especially well with the soft, lacy crepes. For something a little different, try it with Massaman Curry. Basically, if it’s saucy and comforting, it’ll probably be delicious with Roti Jala.
Jumped straight here to the recipe? Please consider coming back to read the whole post when you have the time as I have included step-by-step instructions with photos.

Malaysian Roti Jala (Lace Pancakes | Net Crepes)
Ingredients
- 1 cup all-purpose flour
- ⅛ teaspoon ground turmeric
- ½ teaspoon salt
- ½ teaspoon sugar optional
- 1 egg
- ¾ cup coconut milk
- ½ cup water
- 1 tablespoon coconut oil for the batter
- 2 tablespoons coconut oil for greasing the pan
Instructions
- In a large mixing bowl, whisk together the flour, turmeric, salt, and sugar (if using).
- In a separate bowl, beat the egg, then add coconut milk, water, and 1 tablespoon of coconut oil.
- Slowly pour the wet ingredients into the dry ingredients, whisking to form a smooth batter.
- Let the batter rest for 15–30 minutes.
- Whisk the batter again, then strain it through a fine mesh strainer to remove any lumps.
- Pour the batter into a 3-nozzle squeeze bottle or your DIY tool.
- Heat a small non-stick frying pan over medium heat. Lightly grease with coconut oil using a folded paper towel.
- Working quickly, drizzle the batter in overlapping circular motions to create a lacy net pattern.
- Let it cook for about 1 minute, or until set and no wet batter remains. Do not flip.
- Gently lift the crepe out of the pan and transfer to a plate.
- Repeat with remaining batter, greasing the pan as needed.
- Once slightly cooled, fold each crepe into triangles or roll them up.


Leave a Reply